CyberOps Workstation Installation Guide for UTM
This guide covers the installation of Cisco’s CyberOps Workstation VM on Apple Silicon Macs using UTM with x86 emulation.
Warning: This VM contains tools intended for cybersecurity education and training. Always use these tools ethically and legally in a controlled environment.
Prerequisites
- UTM installed on your Mac (getutm.app)
- At least 40GB free storage space
- 8GB RAM recommended (4GB minimum)
- Homebrew and QEMU installed (for OVA conversion)
- CyberOps Workstation OVA file downloaded from Cisco NetAcad
- Internet connection for downloads
Homebrew & QEMU Required: This guide requires Homebrew and QEMU for converting the CyberOps Workstation VM format. If you haven’t installed these tools yet, please follow our Homebrew Installation Guide first.
Step 1: Obtain the CyberOps Workstation OVA
- 1Obtain OVA
- 2Extract Files
- 3Convert Image
- 4Create VM
- 5Configure VM
- 6First Boot
navigate to This Site Log into your Cisco NetAcad account Download the cyberops_workstation.ova file
Step 2: Extract and Prepare the OVA File
- 1Obtain OVA
- 2Extract Files
- 3Convert Image
- 4Create VM
- 5Configure VM
- 6First Boot
The OVA file is essentially an archive containing disk images and configuration files. We need to extract it first:
# Create a working directory
mkdir cyberops_workstation
cd cyberops_workstation

# Extract the OVA file
tar -xvf /path/to/cyberops_workstation.ova
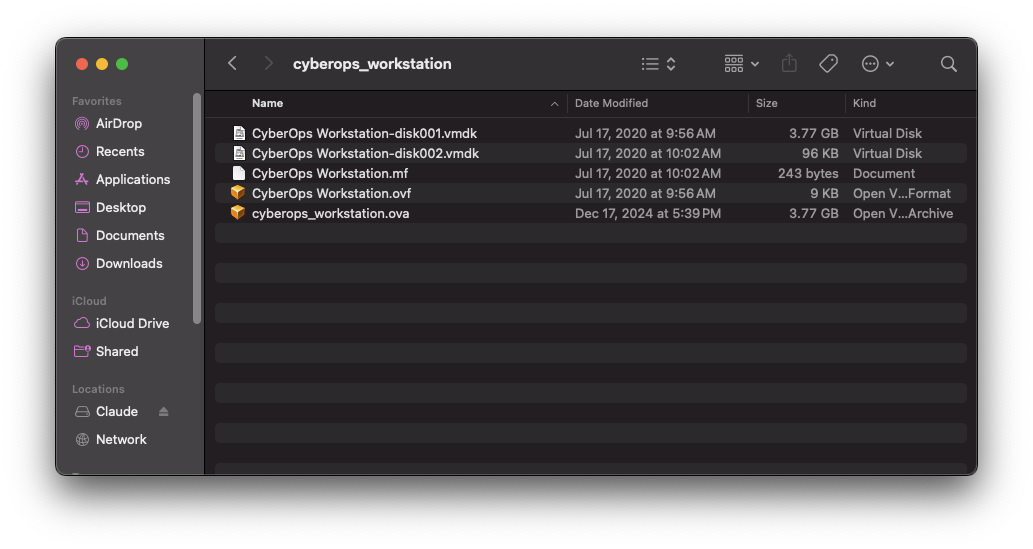
After extraction, you should see several files, including two VMDK (Virtual Machine Disk) files, an OVF file, and an MF file.
Step 3: Convert VMDK to QCOW2 Format
- 1Obtain OVA
- 2Extract Files
- 3Convert Image
- 4Create VM
- 5Configure VM
- 6First Boot
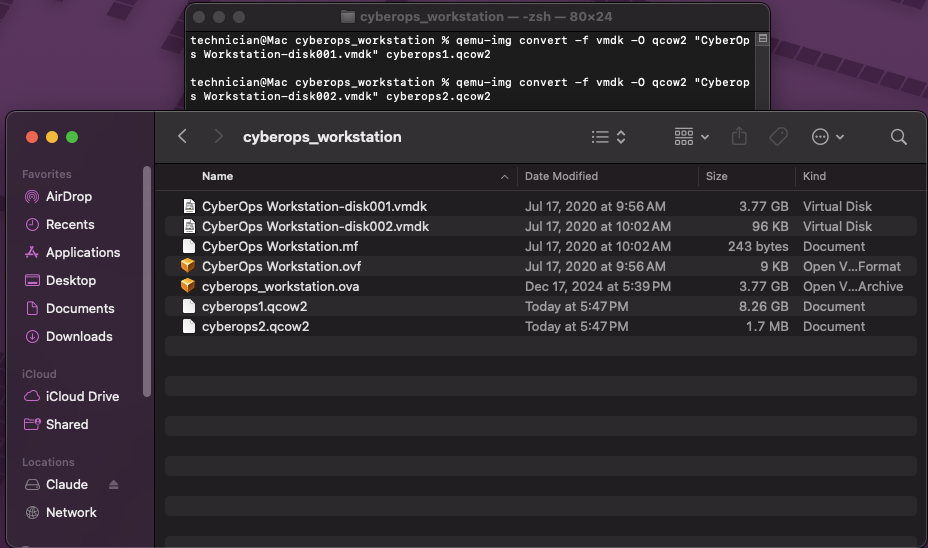
UTM works best with QCOW2 disk images. Use QEMU to convert the VMDK files to QCOW2 format:
# Locate the first VMDK disk file, "CyberOps Workstation-disk001.vmdk"
qemu-img convert -f vmdk -O qcow2 "CyberOps Workstation-disk001.vmdk" cyberops1.qcow2

# Locate the second VMDK disk file, "CyberOps Workstation-disk002.vmdk"
qemu-img convert -f vmdk -O qcow2 "Cyberops Workstation-disk002.vmdk" cyberops2.qcow2
The first VMDK is significantly larger than the second.
Step 4: Create a New VM in UTM
- 1Obtain OVA
- 2Extract Files
- 3Convert Image
- 4Create VM
- 5Configure VM
- 6First Boot
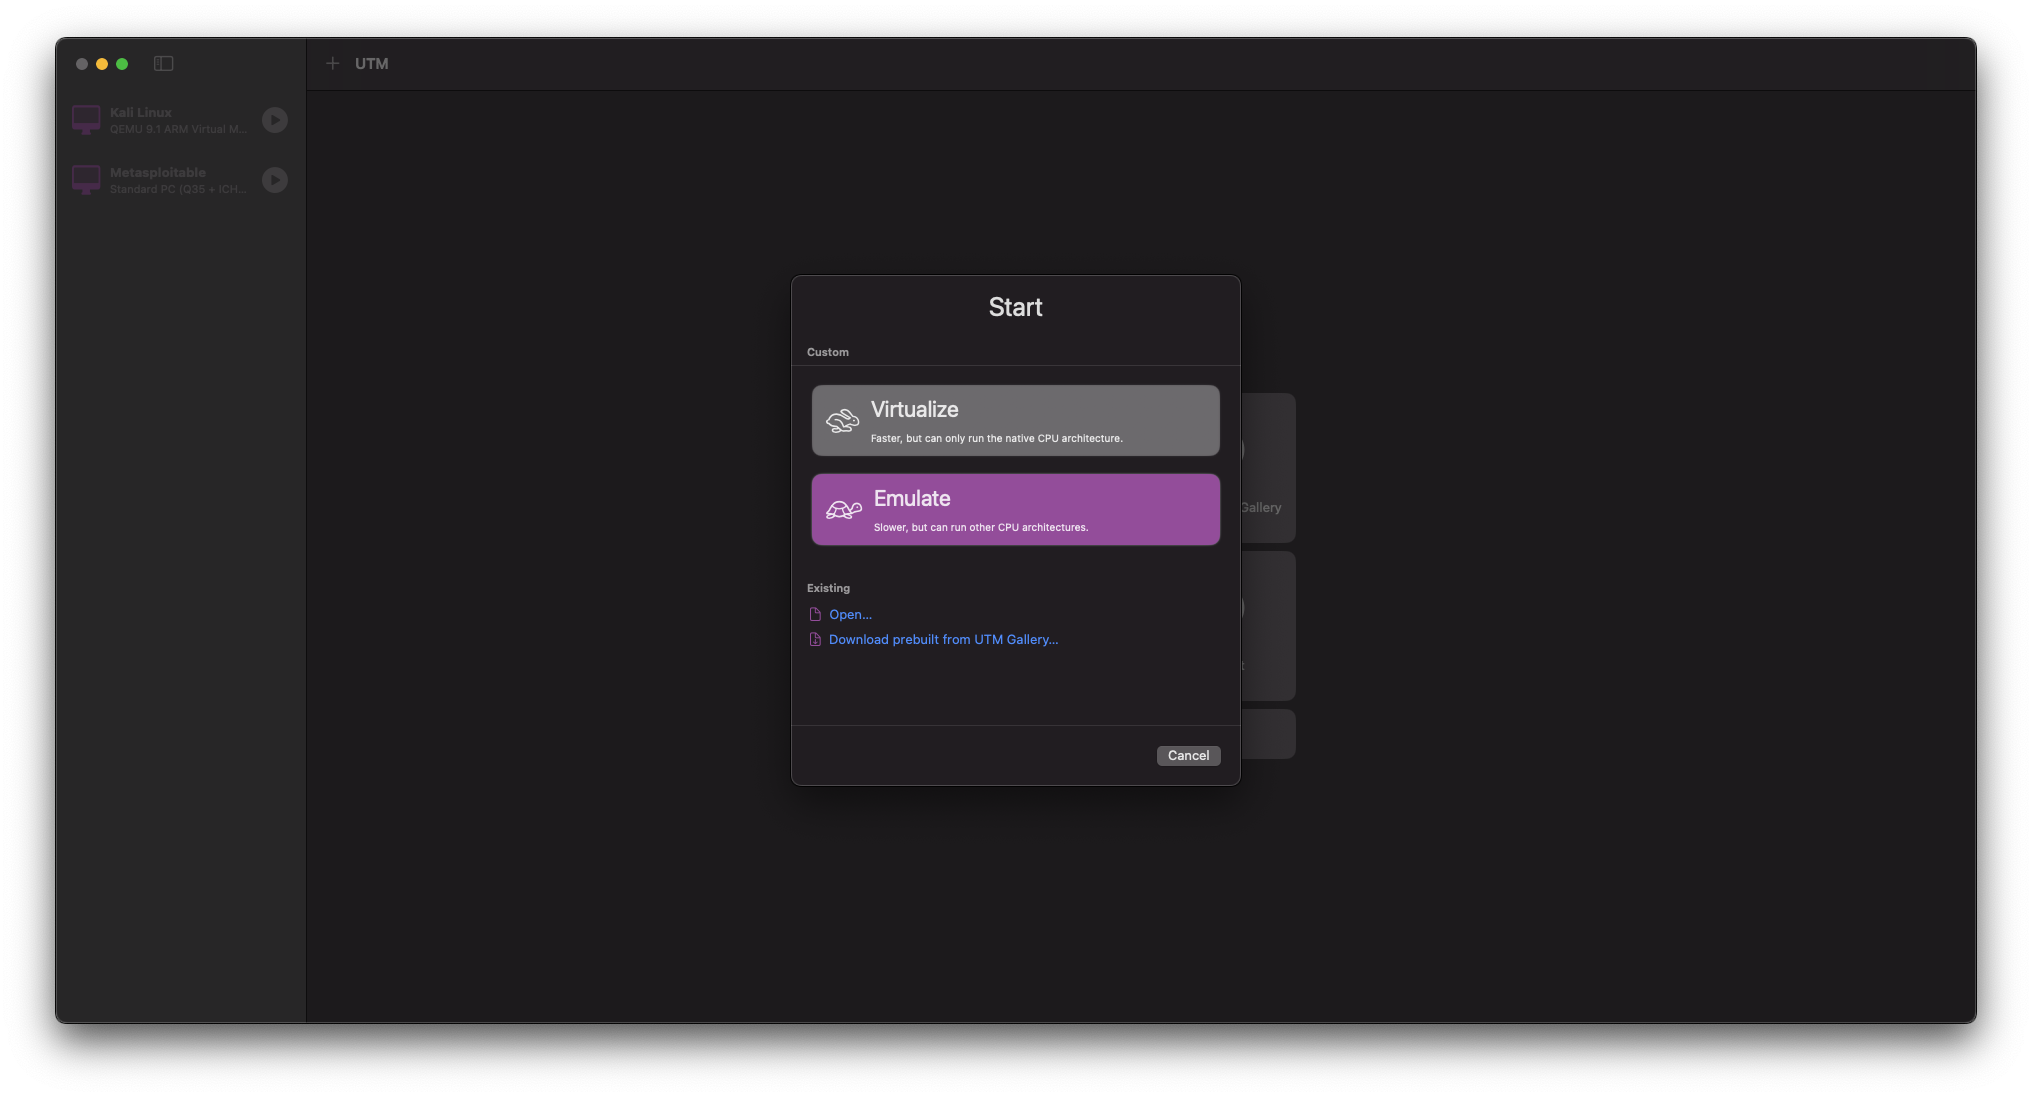
Now we’ll create a new virtual machine in UTM that will use our converted disk image:
-
Open UTM and click on the
+button or selectCreate a New Virtual Machine -
Select
Emulate(since we need x86 emulation)
-
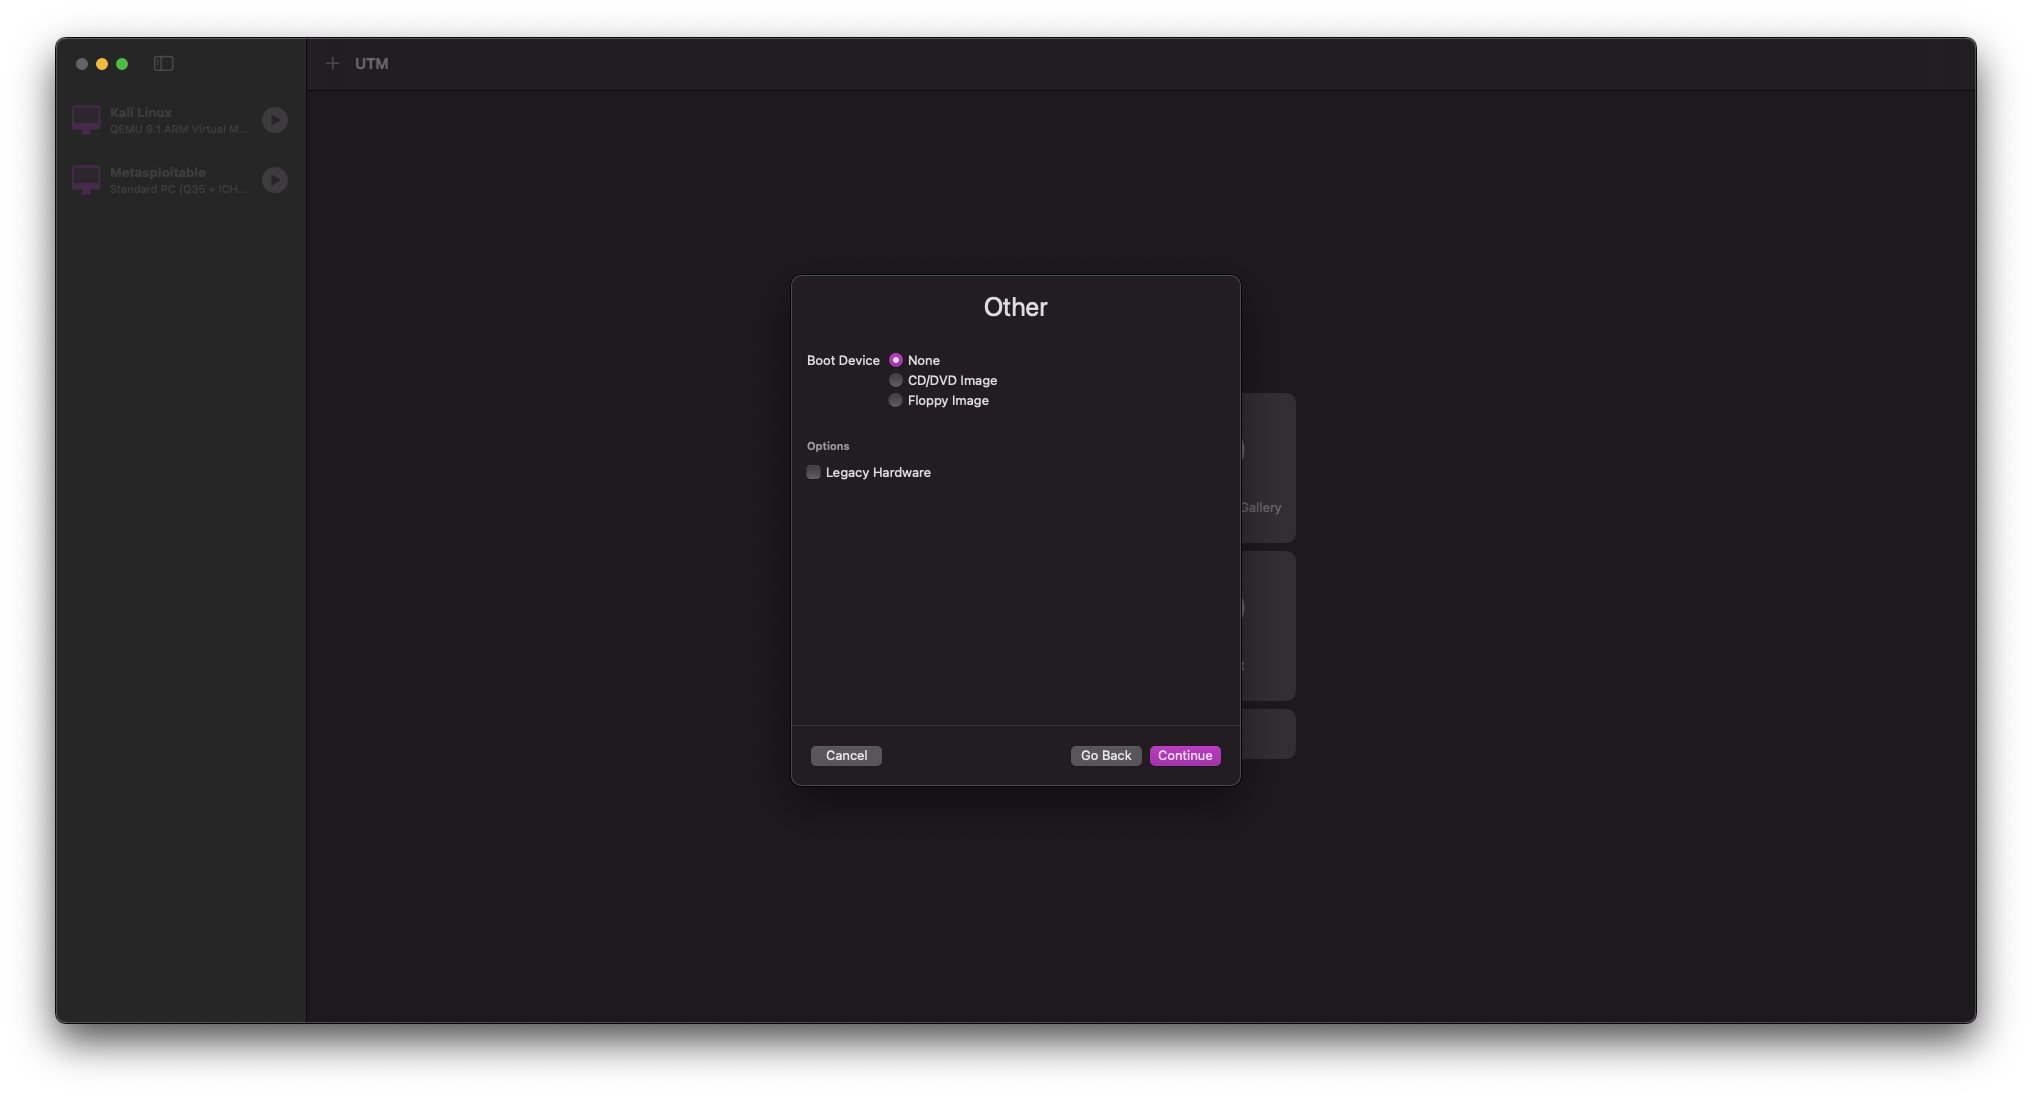
Select
Otheras the operating system -
When asked for a boot device, select
None
Step 5: Configure VM Settings
- 1Obtain OVA
- 2Extract Files
- 3Convert Image
- 4Create VM
- 5Configure VM
- 6First Boot
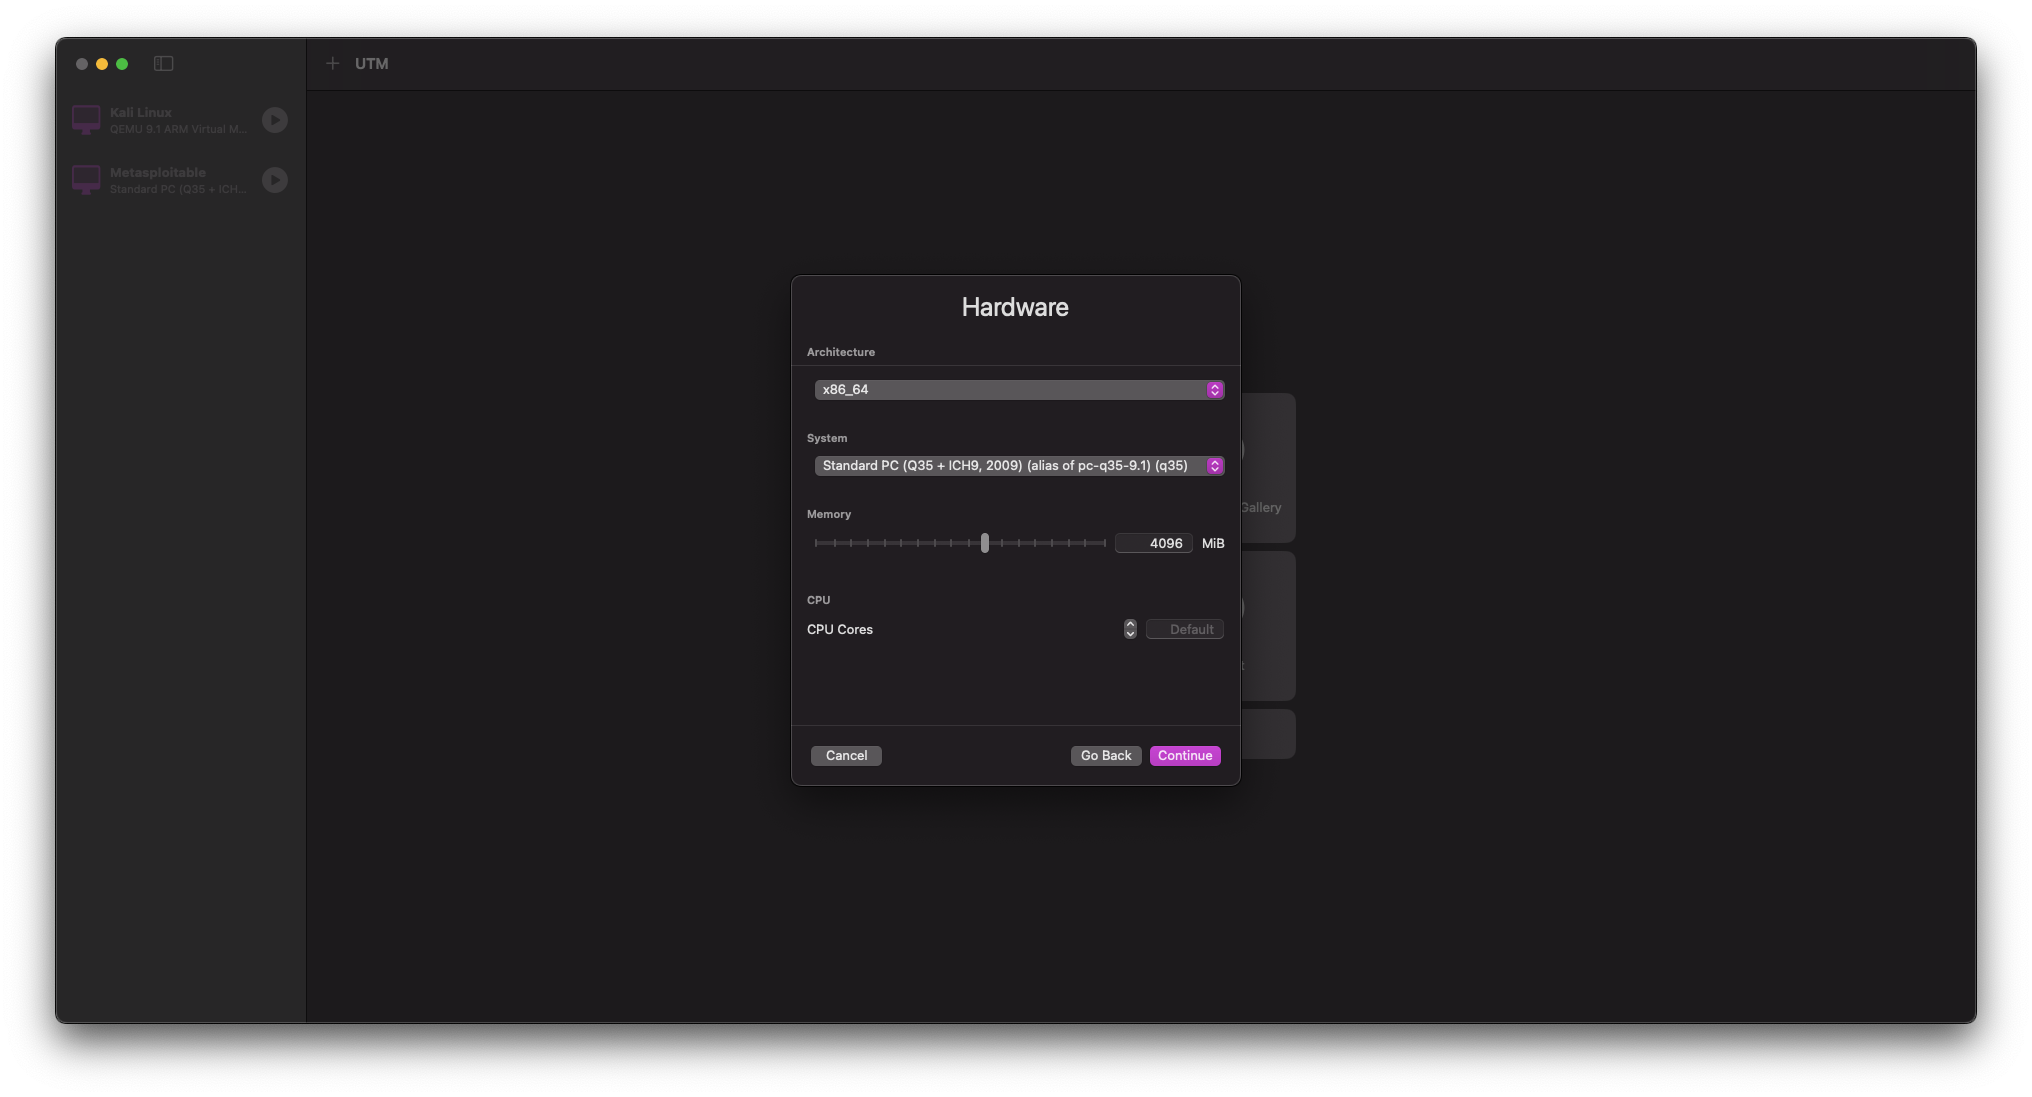
Configure the hardware settings for optimal performance:
- Set the following parameters on the Hardware page:
- Architecture:
x86_64 - System:
Standard PC (Q35 + ICH9, 2009) - Memory:
4096 MB - CPU Cores:
Default
- Architecture:
-
On the Storage screen, you can leave the default setting or reduce it as we’ll be replacing this drive
-
For Shared Directory, you can optionally set up a shared folder for file exchange between your Mac and the VM
-
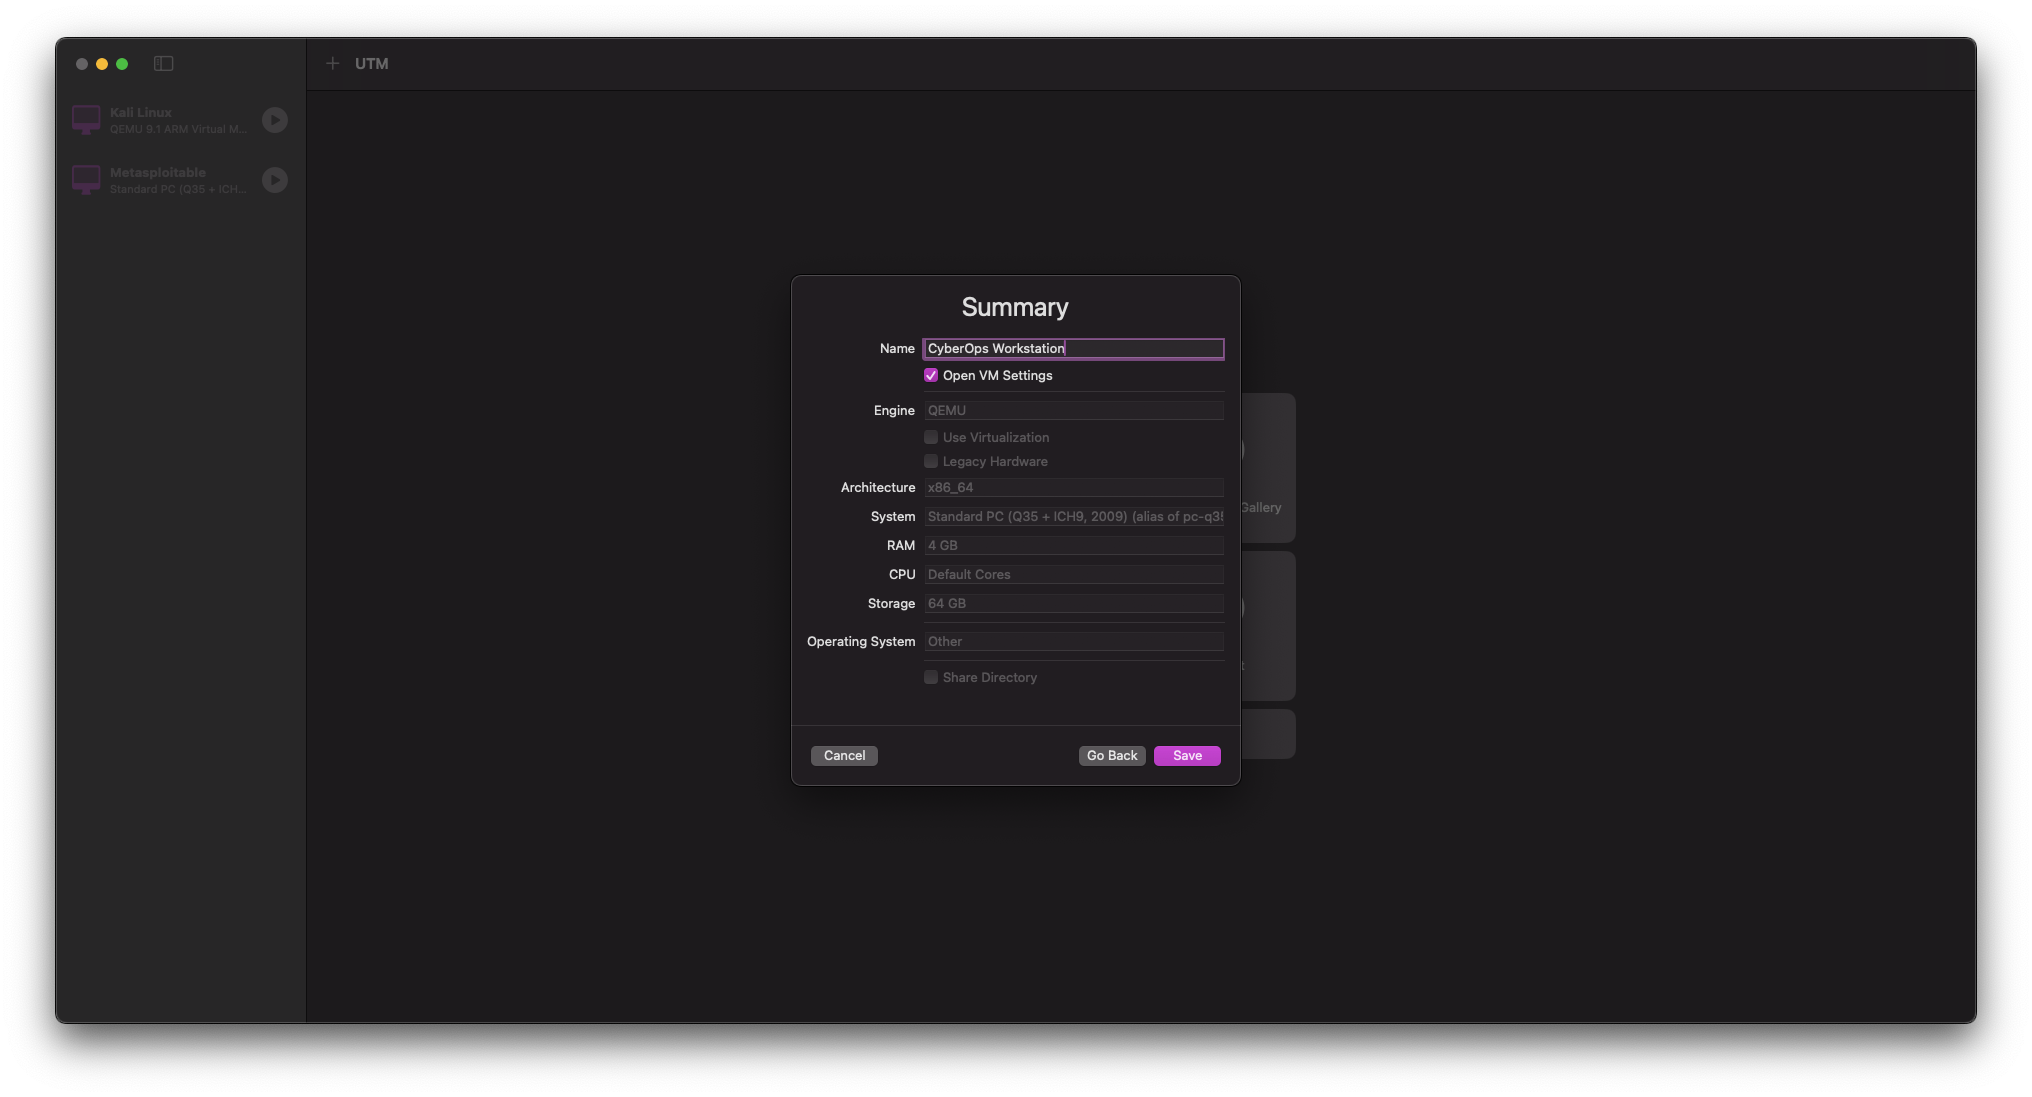
On the summary screen:
- Name the VM
CyberOps Workstation - Check the
Open VM Settingsbox - Click
Save
- Name the VM
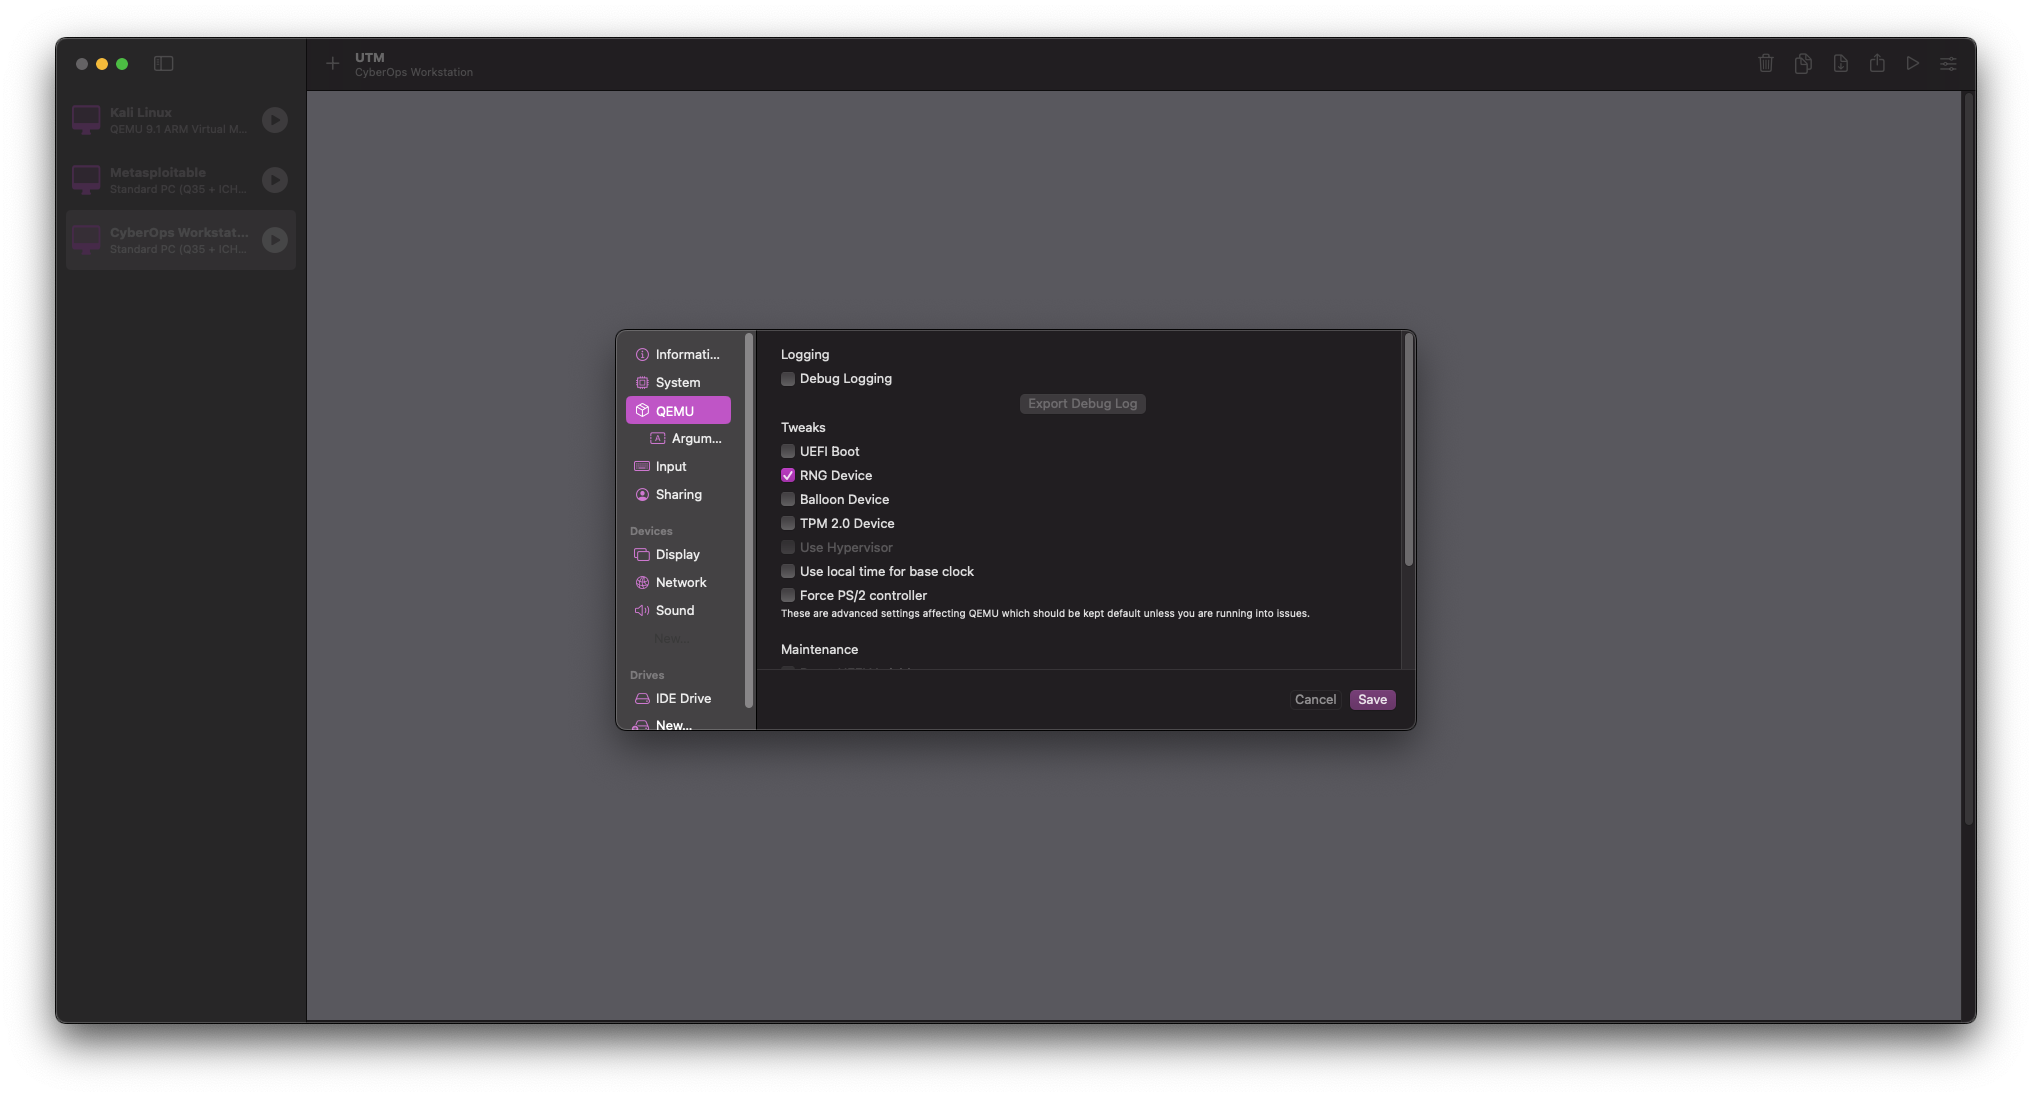
- In VM Settings:
- Select
QEMUfrom the sidebar and uncheckUEFI Boot
- Select
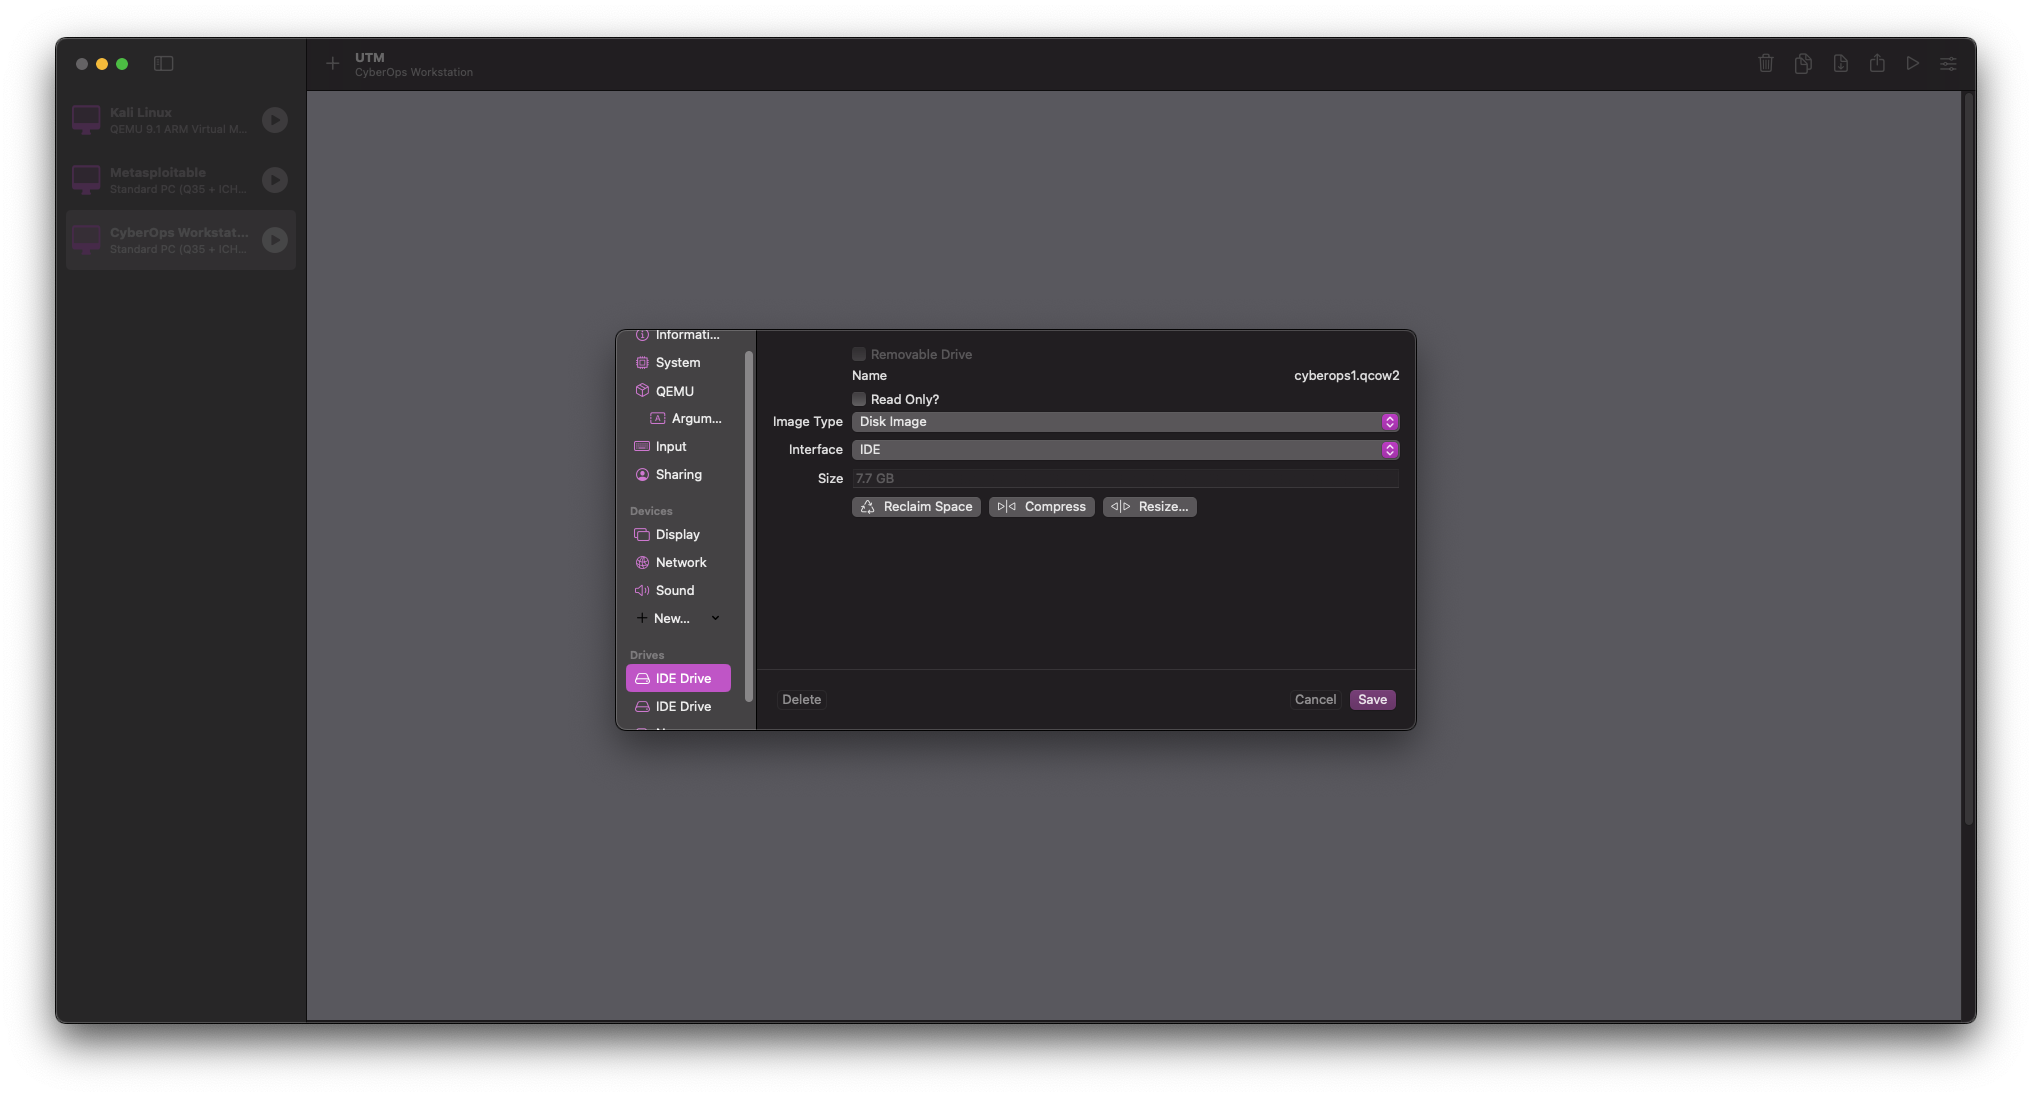
- Still in VM Settings, under
Driveswe need to add our two newqcow2files:- Select and delete the default
IDE Drive - Click
New...>Import - Select the
cyberops1.qcow2file - Click
New...>Import - Select the
cyberops2.qcow2file
- Select and delete the default
- Configure the network:
- Select
Networkunder Devices - Set
Network ModetoHost Onlyfor an isolated lab environment - Alternatively, use
Shared Networkif you need the VM to access the internet
- Select
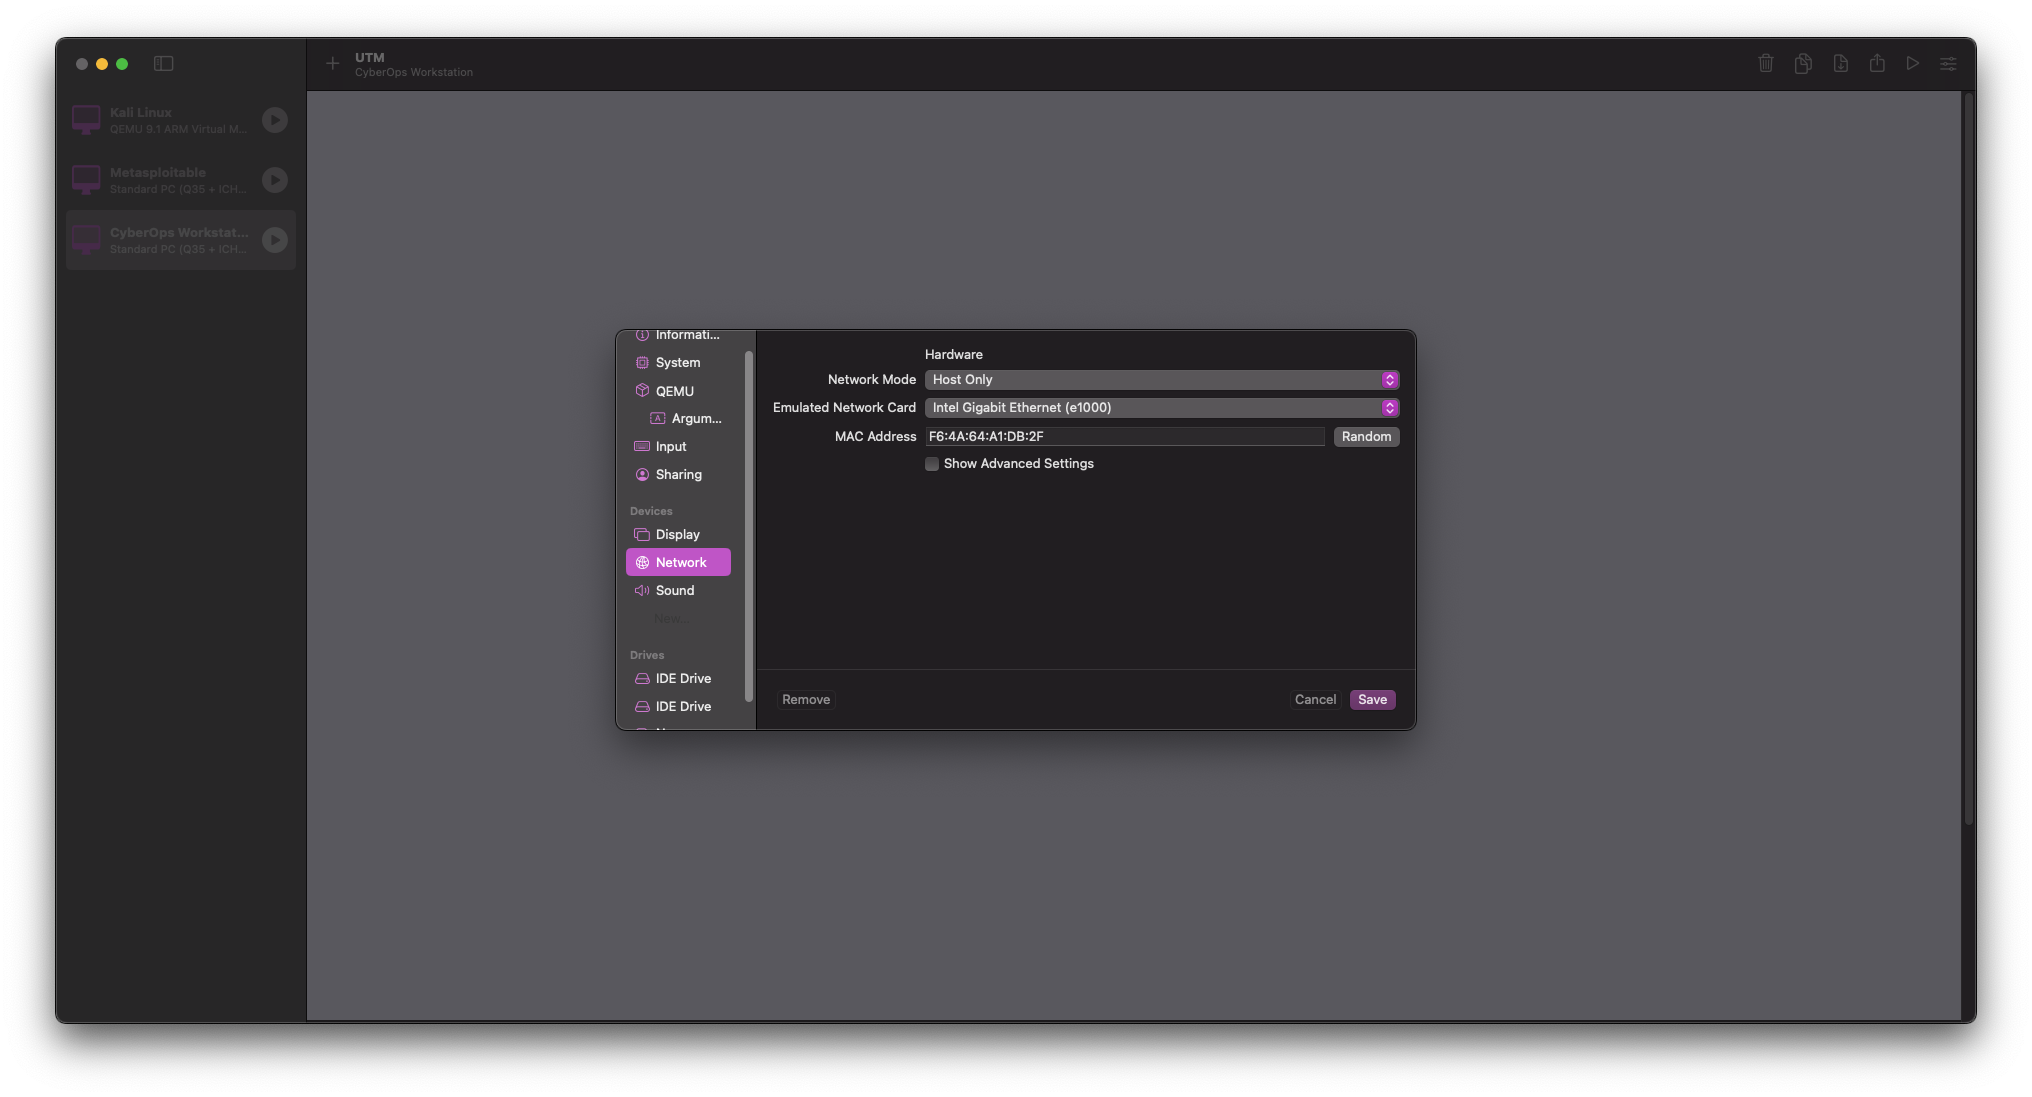
- Click
Saveto apply all settings
Step 6: First Boot and Login
- 1Obtain OVA
- 2Extract Files
- 3Convert Image
- 4Create VM
- 5Configure VM
- 6First Boot
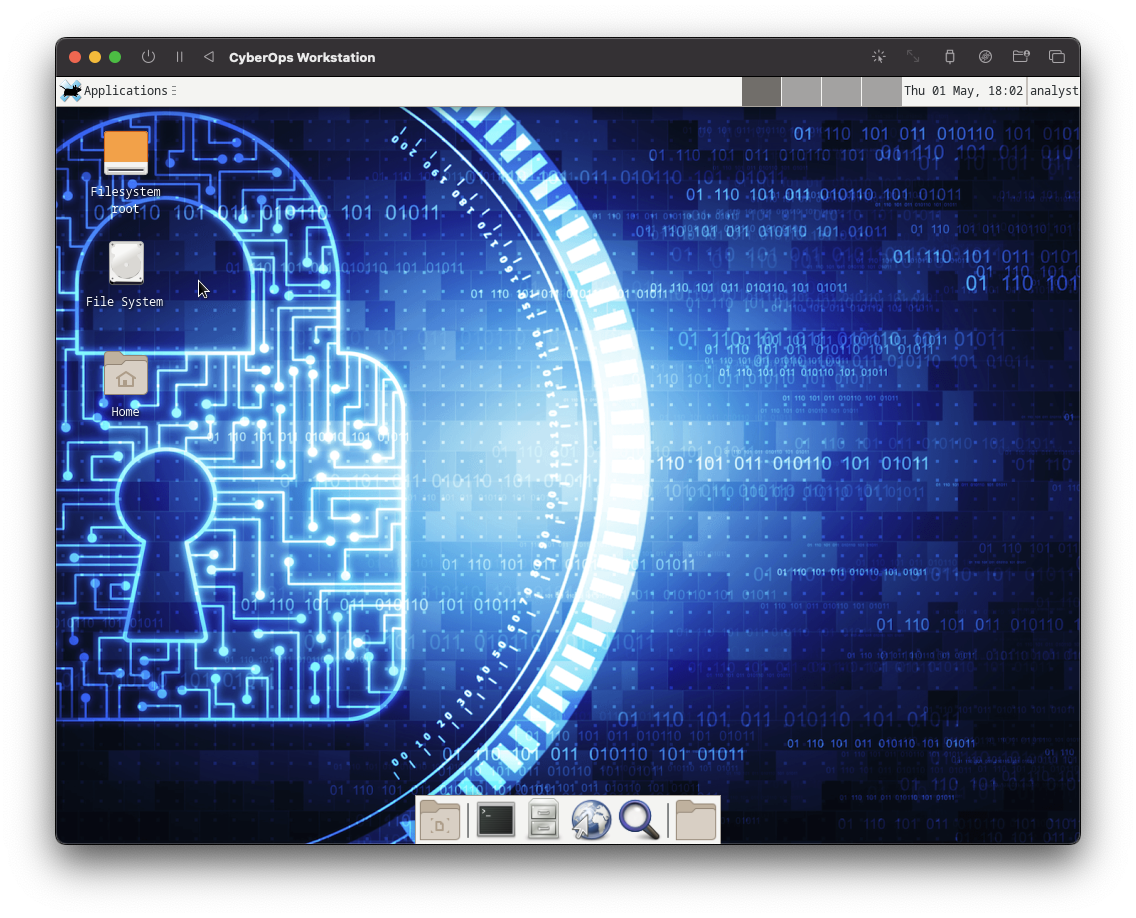
-
Start the VM by clicking the play button
-
If everything is configured correctly, the VM should boot to a login screen after a short delay

- Log in with the following credentials:
- Username:
analyst - Password:
cyberops
- Username:
- Once logged in, you should see the CyberOps Workstation desktop environment
Multi-VM Environment Setup
The CyberOps Workstation is designed to work in a lab environment with other security VMs.
Configure all VMs to use the same UTM network mode (Host Only) to enable communication between them.
Troubleshooting
Common Issues:
- Boot Failure: Ensure UEFI Boot is unchecked in the QEMU settings
- Network Issues: Verify network settings are correctly configured
- Performance Problems: Try allocating more RAM or CPU cores
- VM Freezes: UTM emulation of x86 on Apple Silicon can be resource-intensive; try closing other applications
Conclusion
You have successfully set up the Cisco CyberOps Workstation VM on your Apple Silicon Mac. This VM provides an excellent platform for learning and practicing cybersecurity skills in a controlled environment.
Remember that security tools should only be used ethically and legally on systems you have permission to test.