Metasploitable 2 Installation Guide for UTM
This guide covers the installation of Metasploitable 2 on Apple Silicon Macs using UTM with x86 emulation.
Warning: Due to its intentionally vulnerable nature, Metasploitable 2 should NEVER be exposed to the public internet. Always use it in an isolated lab environment.
Prerequisites
- UTM installed on your Mac (getutm.app)
- At least 25GB free storage space
- 4GB RAM or more
- Homebrew installed (for QEMU tools)
- Internet connection for downloads
Homebrew & QEMU Required: This guide requires Homebrew and QEMU for converting the Metasploitable VM format. If you haven’t installed these tools yet, please follow our Homebrew Installation Guide first.
Step 1: Download Metasploitable 2
- 1Download VM
- 2Convert Image
- 3Create VM
- 4Configure VM
- 5Import Disk
- 6First Boot
Download the Metasploitable 2 virtual machine:
- Visit Rapid7’s Metasploitable page
- Alternatively, download directly from SourceForge
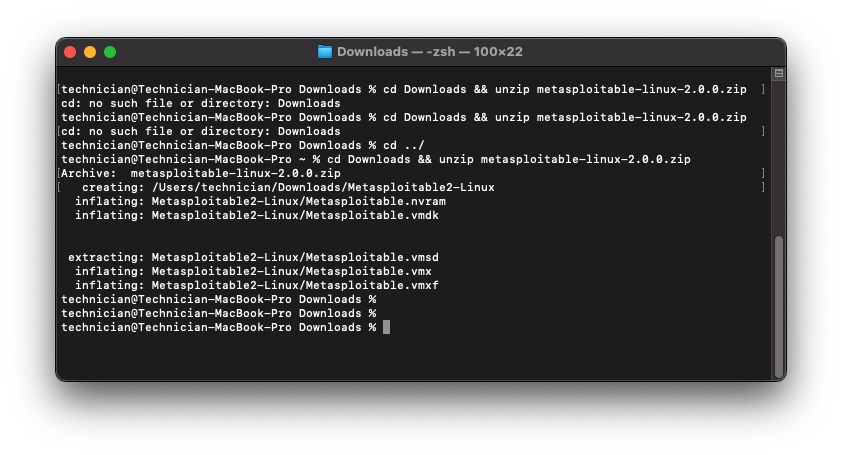
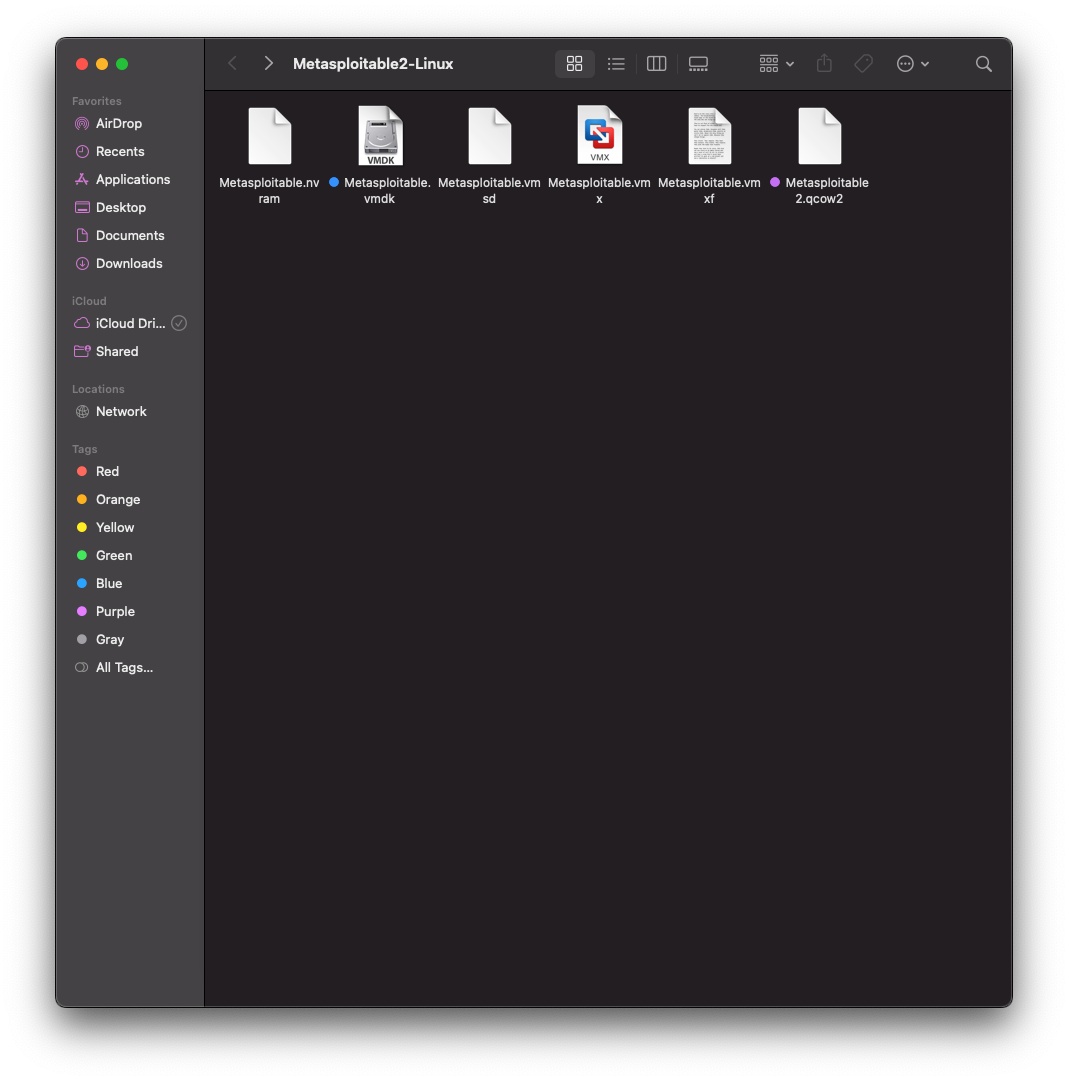
Once downloaded, extract the ZIP archive to access the VMDK disk image:
   cd Downloads
   unzip metasploitable-linux-2.0.0.zip
Step 2: Convert VMDK to QCOW2 Format
- 1Download VM
- 2Convert Image
- 3Create VM
- 4Configure VM
- 5Import Disk
- 6First Boot
UTM performs best when working with QCOW2 files, so we will need to convert our VMDK file to QCOW2 format to proceed.
Navigate to the directory that contains your Metasploitable VMDK:
cd Downloads/metasploitable-linux-2.0.0
Convert the VMDK to QCOW2 format:
qemu-img convert -f vmdk -O qcow2 Metasploitable.vmdk Metasploitable2.qcow2
The conversion process may take a few minutes depending on your Mac’s performance.
Step 3: Create a New VM in UTM
- 1Download VM
- 2Convert Image
- 3Create VM
- 4Configure VM
- 5Import Disk
- 6First Boot
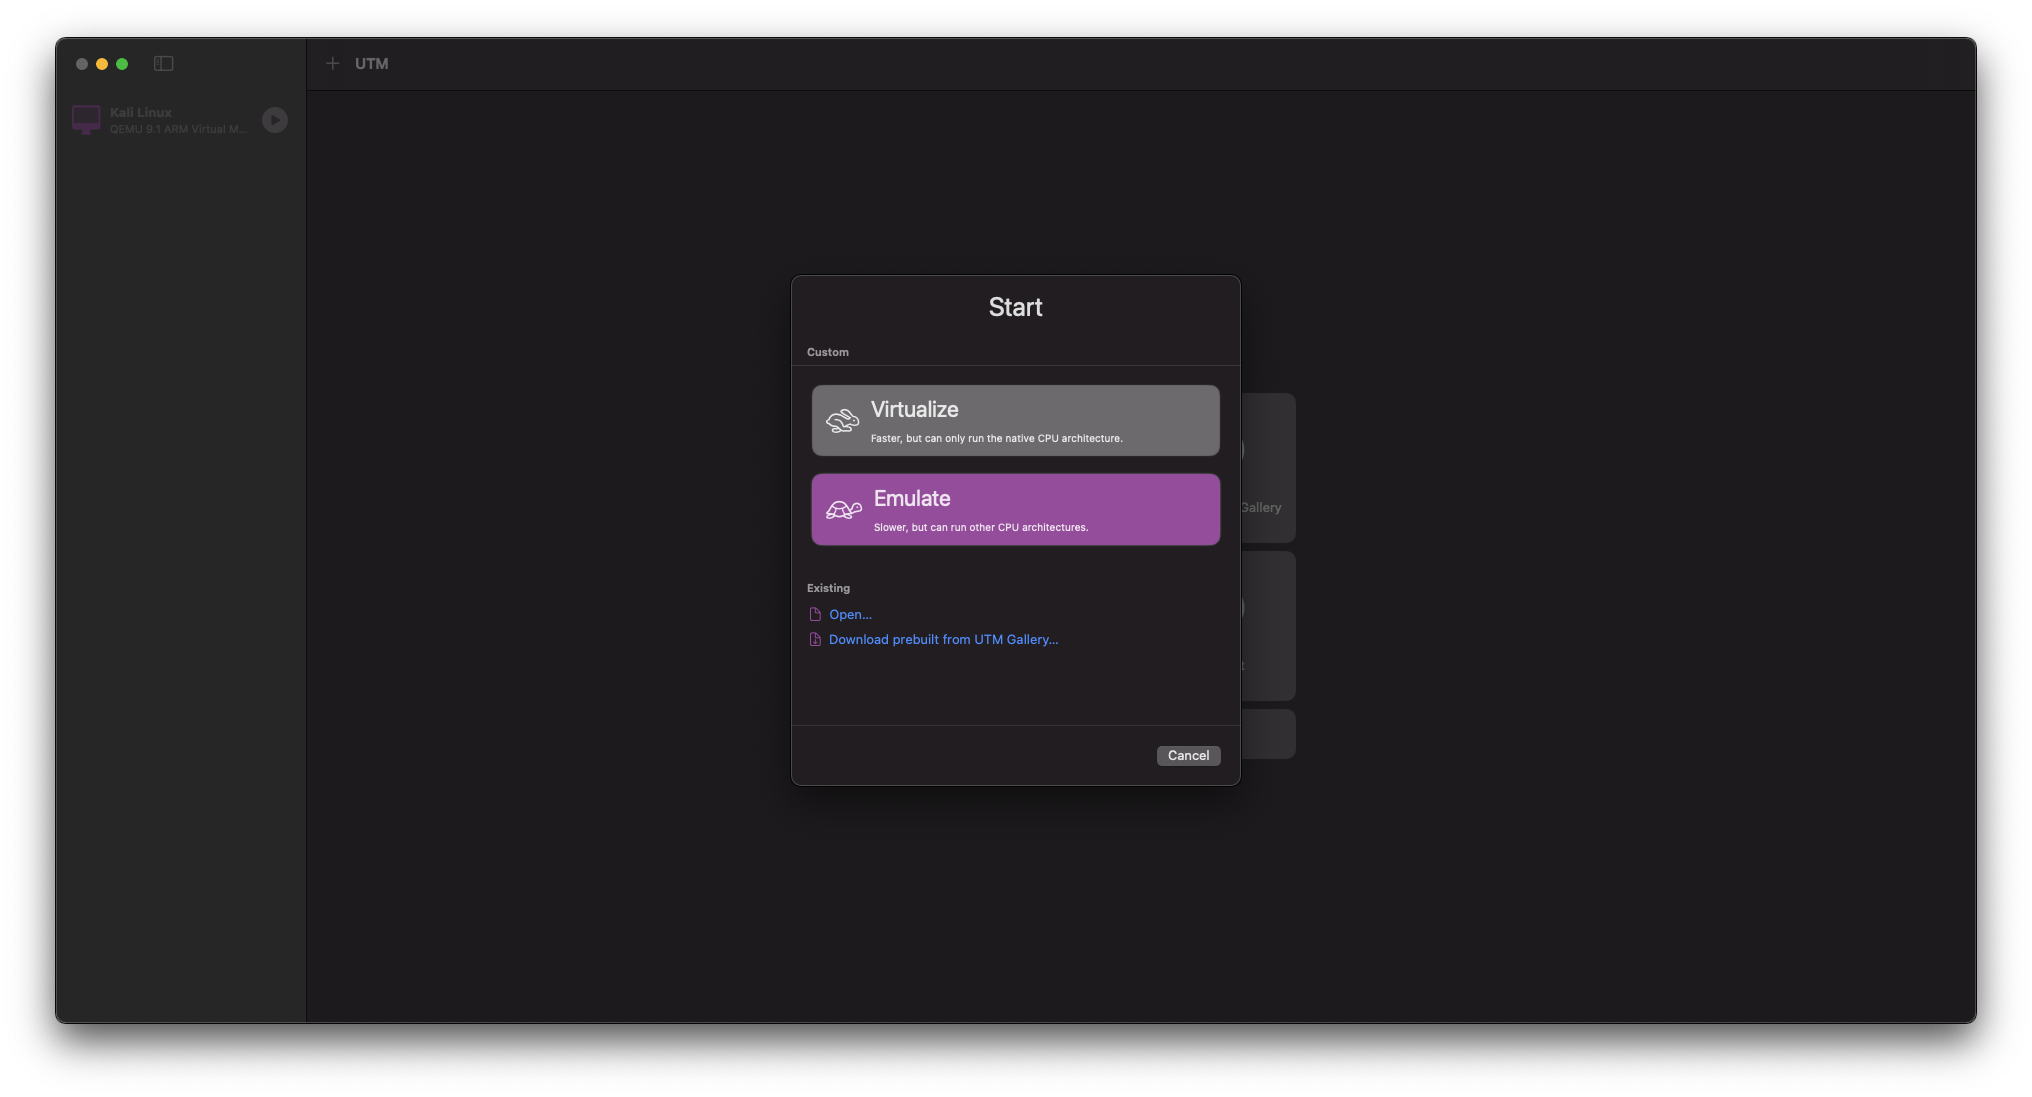
Open UTM and click on Create a New Virtual Machine
Select Emulate (for x86 architecture)
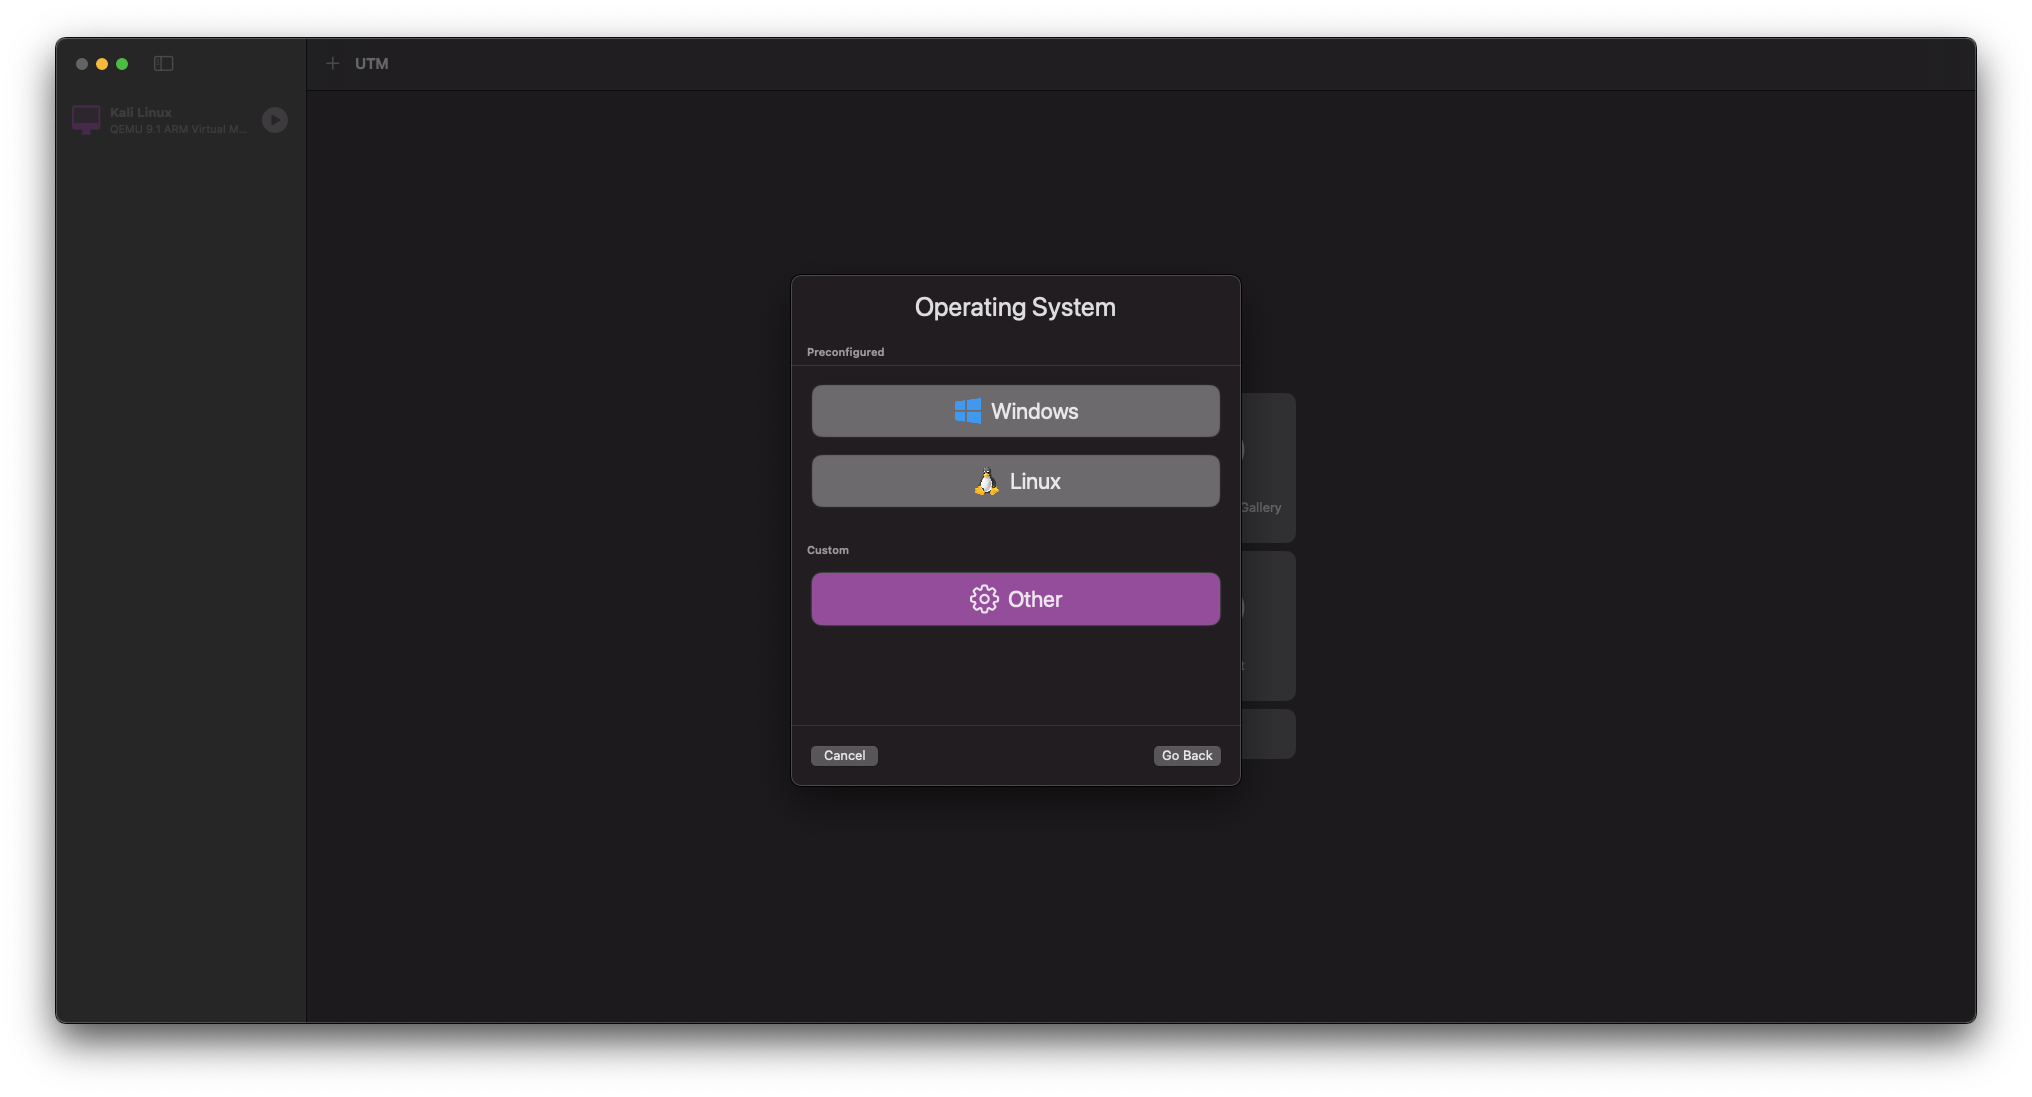
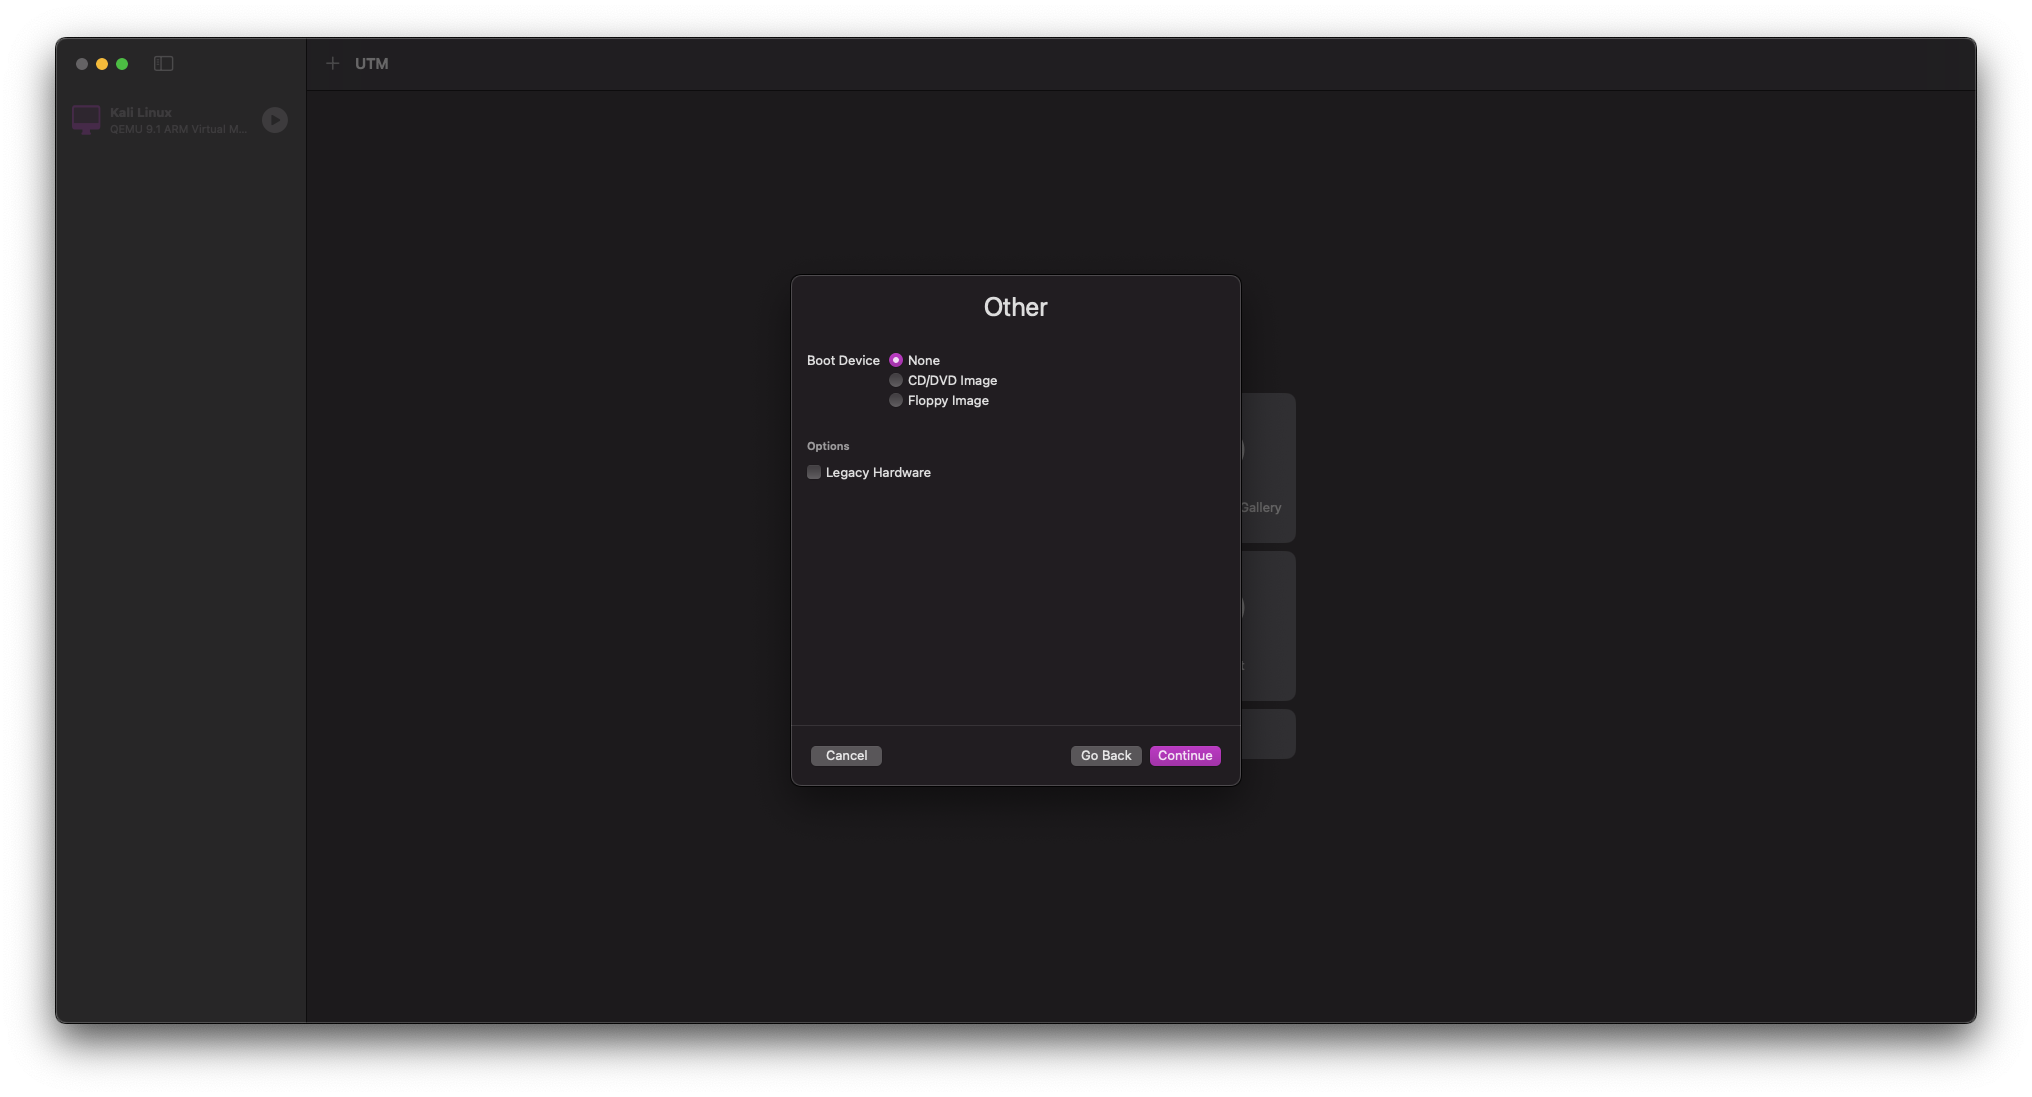
Choose Other as the operating system
At the option to select your Boot Device select None
Step 4: Configure VM Settings
- 1Download VM
- 2Convert Image
- 3Create VM
- 4Configure VM
- 5Import Disk
- 6First Boot
On the VM hardware screen, set the following parameters: - RAM can be set relatively low, at a minimum of 512 MiB - CPU Cores should be left at their default settings - All other settings may be left default
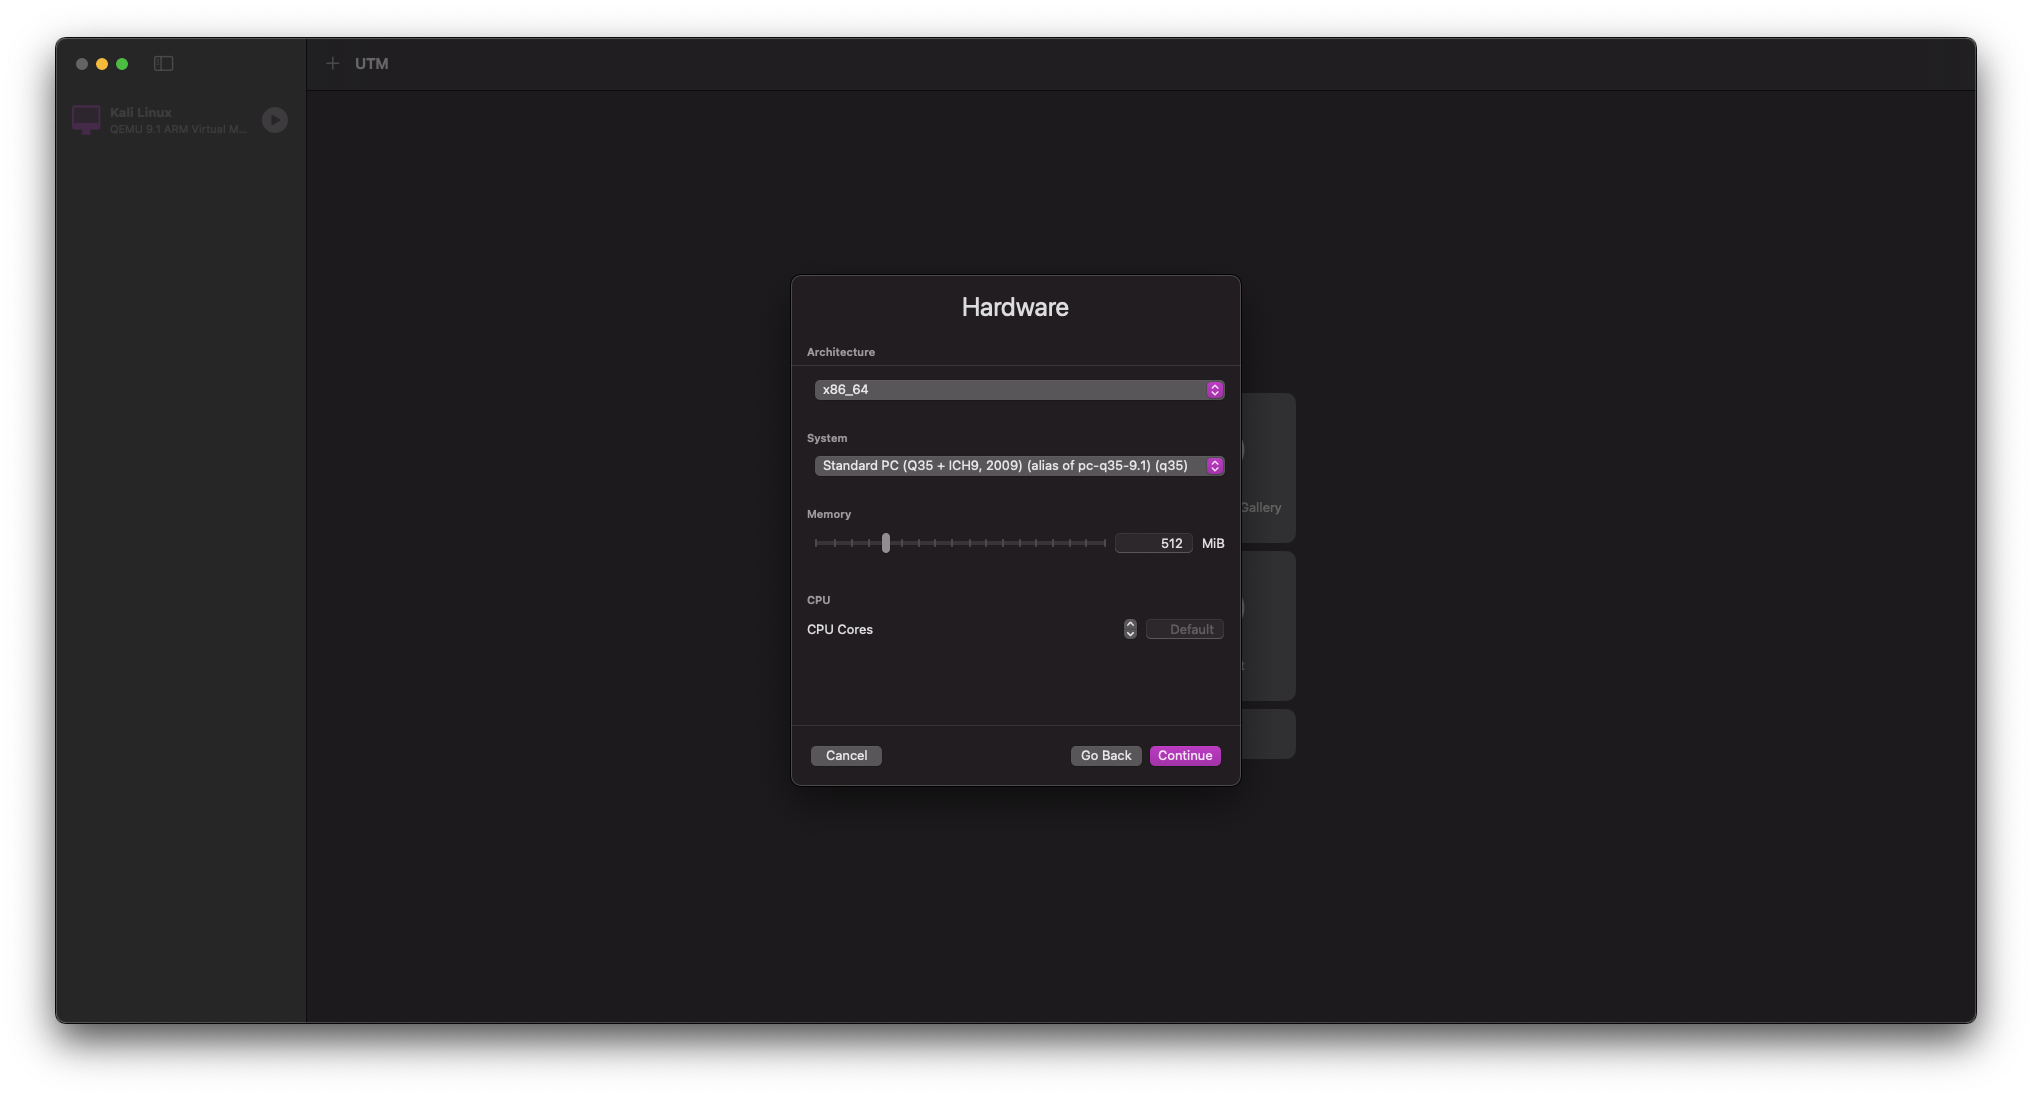
STORAGE can be reduced from its default size of 64 GiB to a more manageable 2 GiB.
Select Continue
SHARED DIRECTORY Settings can be left default
Select Continue
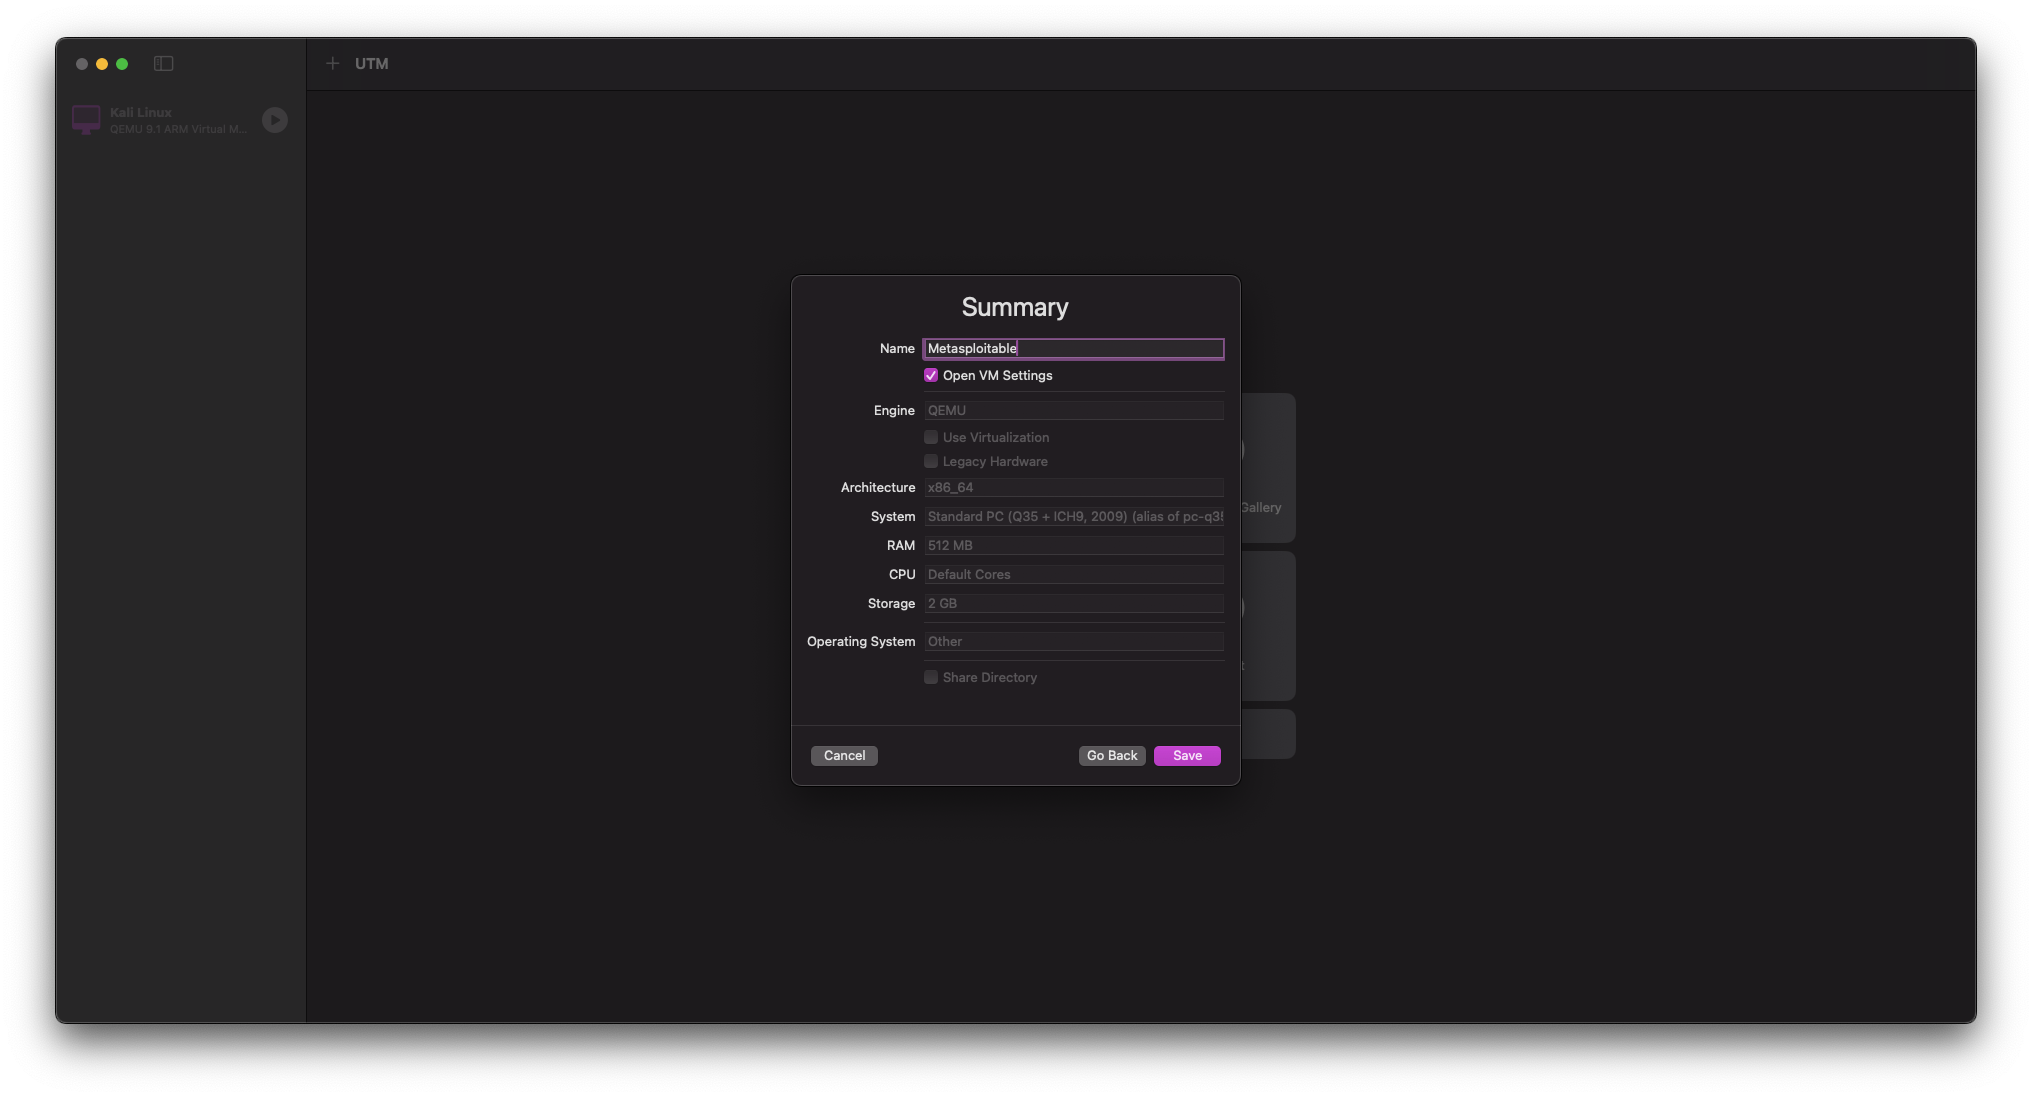
Once you have arrived at the VM SUMMARY screen, perform the following tasks: - Name the VM Metasploitable 2 - Select Open VM Settings - Ensure all of your settings match those from previous steps
When you are sure your settings are correct, select Save
Step 5: Import Disk and Configure Network
- 1Download VM
- 2Convert Image
- 3Create VM
- 4Configure VM
- 5Import Disk
- 6First Boot
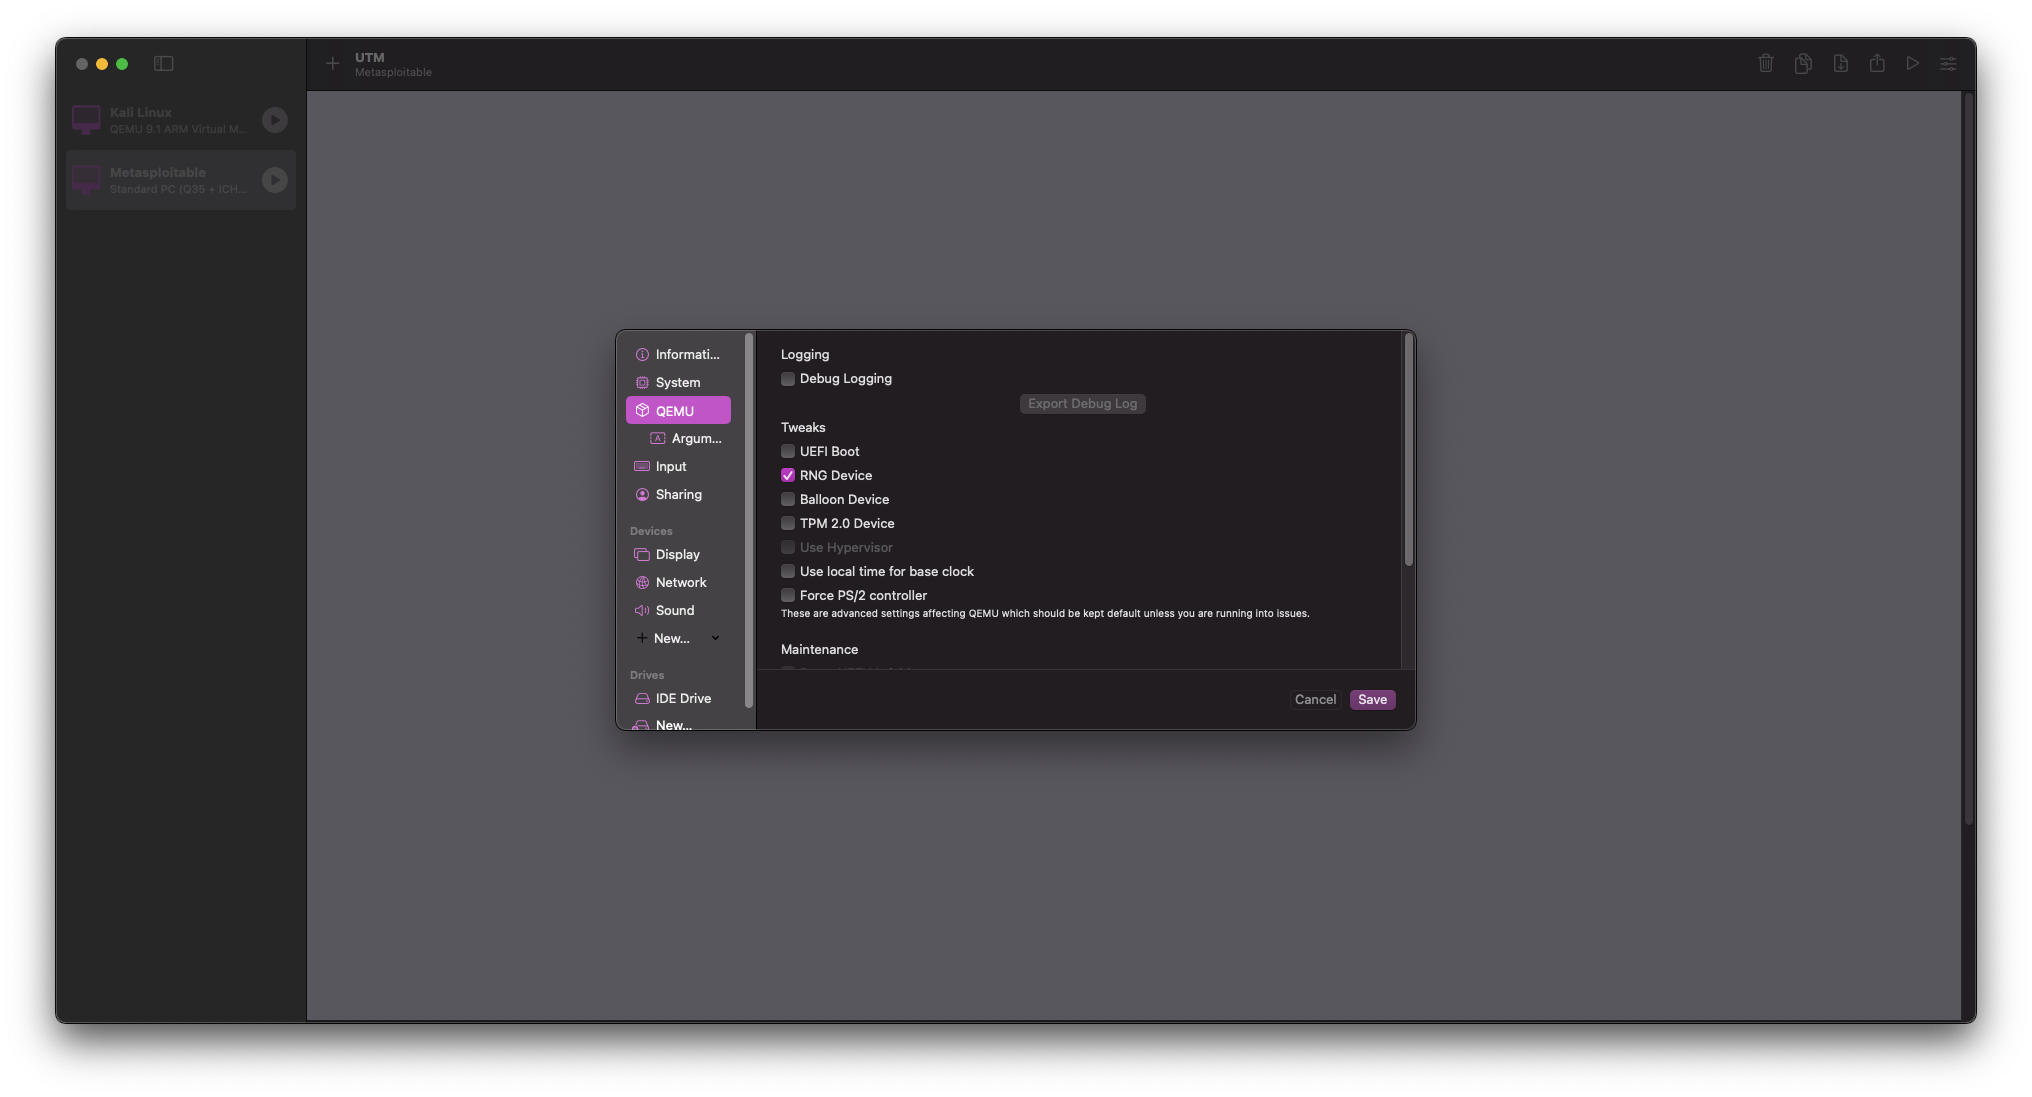
Once the VM settings window has opened, navigate to QEMU and uncheck UEFI Boot
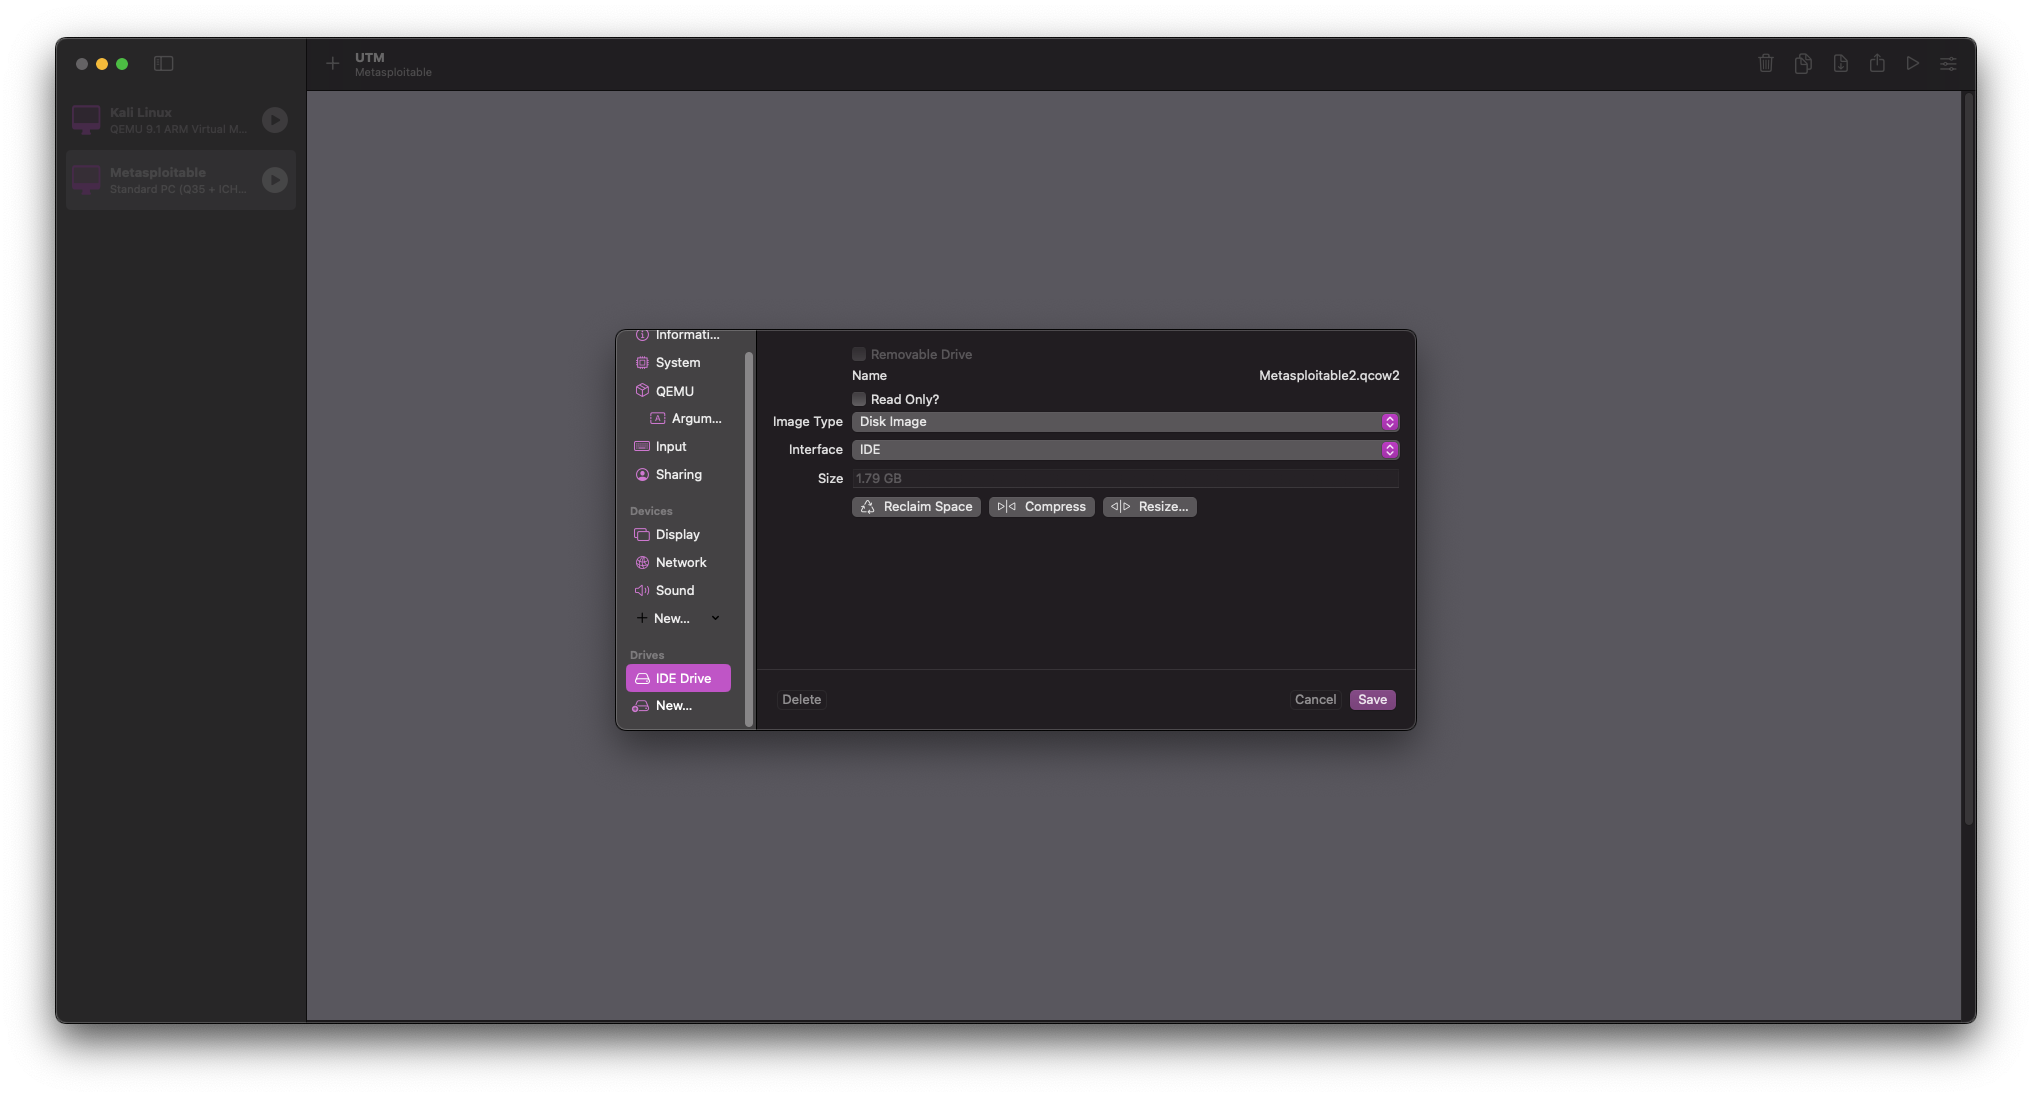
Move down to Drives and delete the default IDE Drive
Select New > Import > then select your Metasploitable2.qcow2 file from earlier
Navigate to Network in the Devices section and change Network Mode to Host Only
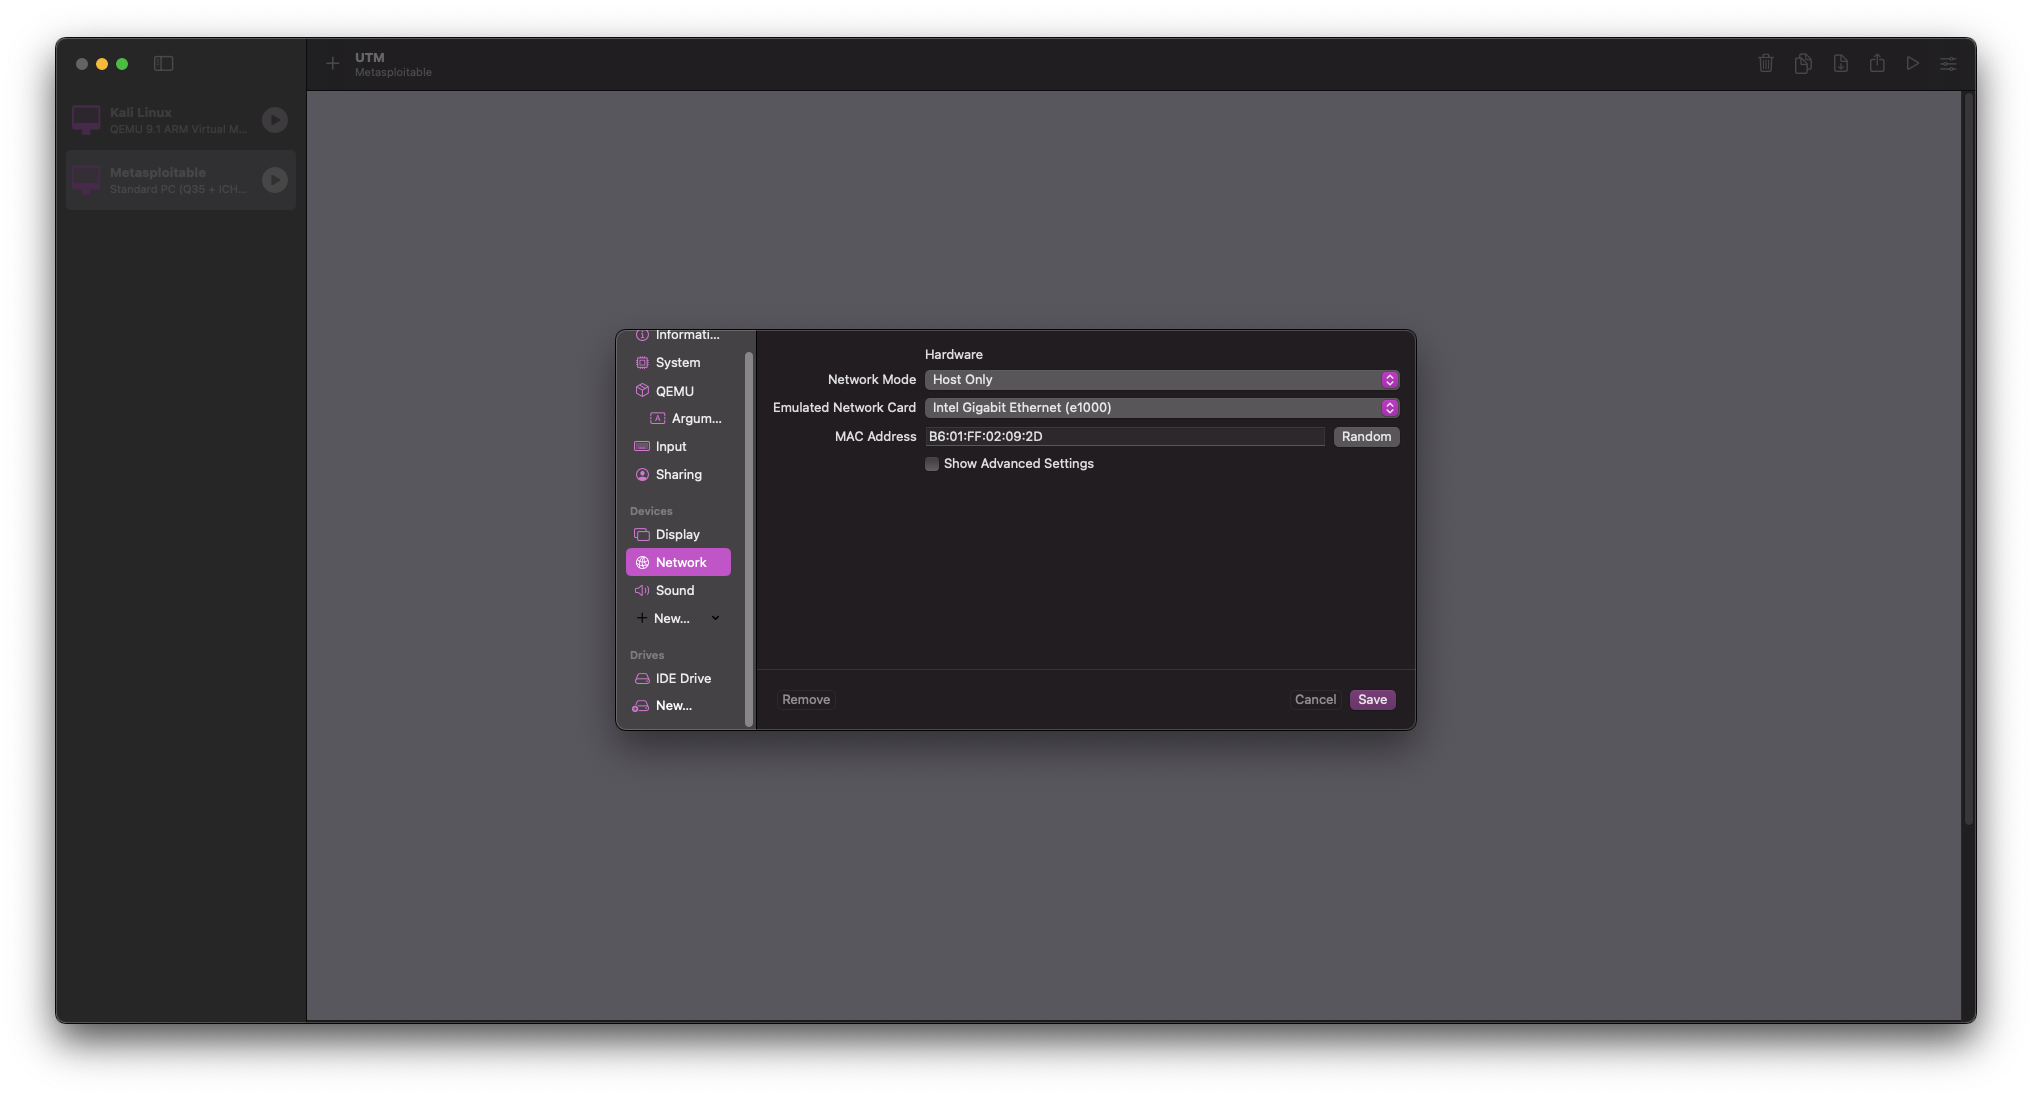
Select Save
Step 6: First Boot and Initial Configuration
- 1Download VM
- 2Convert Image
- 3Create VM
- 4Configure VM
- 5Import Disk
- 6First Boot
Start the Metasploitable 2 VM by clicking the UTM central Play button
After a short first boot sequence, you should be greeted with a screen that looks similar to the following image:
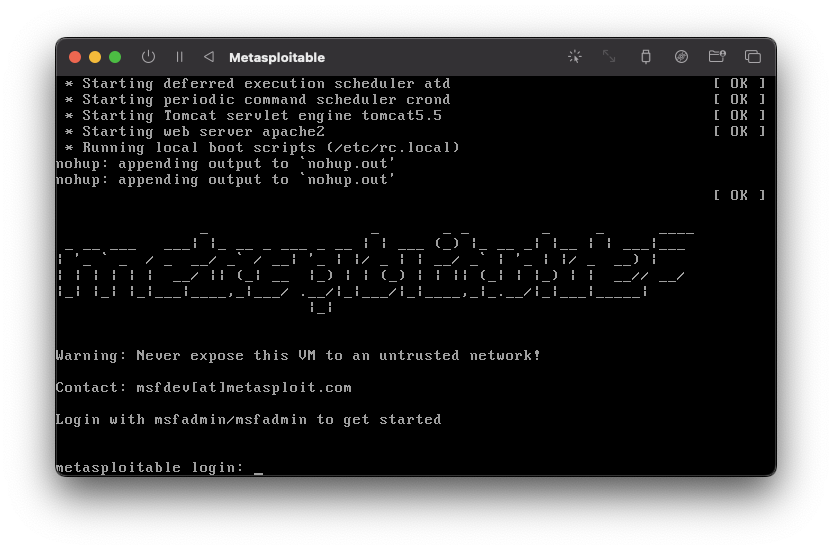
To log into the VM, use the following credentials:
- Username:
msfadmin - Password:
msfadmin
Testing VM Connectivity
After completing the installation, you can test connectivity between your Kali Linux VM and Metasploitable 2:
On your Metasploitable 2 VM, find its IP address:
ifconfig
On your Kali Linux VM, scan for the Metasploitable VM on your network:
sudo netdiscover
Important: The purpose of this information is educational. Always practice
ethicalhacking and only attack systems you havepermissionto test.
Vulnerable Services in Metasploitable 2
Metasploitable 2 contains numerous deliberately vulnerable services:
| Service | Port | Vulnerability |
|---|---|---|
| FTP | 21 | Anonymous access, backdoored version |
| SSH | 22 | Weak credentials |
| Telnet | 23 | Clear text, weak credentials |
| SMTP | 25 | Open relay |
| HTTP | 80 | Multiple web vulnerabilities |
| Tomcat | 8180 | Default credentials |
| MySQL | 3306 | Weak credentials |
| PostgreSQL | 5432 | Weak credentials |
| UnrealIRCD | 6667 | Backdoored version |
| Samba | 139/445 | Multiple vulnerabilities |
| DISTCC | 3632 | Remote code execution |
| VNC | 5900 | Weak authentication |
Troubleshooting
Common Issues:
- If your VM fails to boot, ensure UEFI Boot is unchecked in the QEMU settings
- If network connectivity fails, verify both VMs are using the same network mode
- If you encounter slow performance, consider allocating more RAM (up to 1 GiB)
Next Steps
Now that you have Metasploitable 2 running, you can:
- Set up a complete lab environment by installing additional VMs
- Practice scanning and enumeration techniques from your Kali VM
Conclusion
You have successfully set up Metasploitable 2 on your Apple Silicon Mac using UTM. This deliberately vulnerable VM provides an excellent platform for practicing penetration testing techniques in a safe, controlled environment.
For additional resources and practice exercises, check out our other guides on this site.